Protecting Tomatoes Against Heat
Temperatures are rising, and plants are taking a beating, especially tomatoes. From blossom loss to poor growth, this South American fruit can’t always beat the heat. “Tomatoes grow best at uniformly moderate temperatures between 65 to 85 degrees Fahrenheit,” claims Colorado State University, “This is why a high altitude, semiarid climate like Colorado with wide daily temperature swings is not a favorable area for tomato growing (PlantTalk, 2025).” It’s important to identify heat stress compared to fungal issues. We’re going to go over some techniques for identifying heat stress and keeping tomatoes cool!
Heat Stress Signs
Are your blossoms falling off the tomato plant? Or has their growth suddenly halted? What about wilting? These are all signs of heat stress in tomatoes. Blossom loss is caused by high temperatures interfering with pollination. Dry winds don’t carry pollen well, so blossoms go unfertilized and die off. Halted growth is caused by cool night temperatures and scorching hot day temperatures, the contrast induces stress. And wilt is caused by numerous factors, not just heat. If the soil is dry, then it may be caused by accelerated evaporation due to heat. Fungal wilt disease is another issue caused by heat, due to the combination of a moist environment and then sudden heat. There are several varieties of fungal wilt, so we recommend checking out this article to fight them accordingly: Click here!
Fighting Heat
Time to beat the heat! Anything that retains moisture and shields plants from the sun will protect your tomatoes. We recommend a shade hail cloth, preferably one with a percentage like 30% light blockage. This filtered shade cloth will allow the tomatoes to get enough light while also creating a cool environment. Shade cloth shouldn’t be draped on the plant, it should be supported by PVC pipe or a tomato cage. Plus, it will also protect against hail when it hits!
Applying mulch will help retain moisture. Apply mulch in vegetable beds and containers. Make sure not to layer mulch right against the stem of the plant. Leaving space between mulch and plants helps prevent further fungal infections. Make sure the mulch isn’t dyed either. Dye isn’t safe for human consumption. Leaf mulch will also do the same thing! Leaf mulching involves shredding leaves that fall from trees to make your own mulch! It retains moisture like shredded wood mulch but also gives back precious nitrates, helping your tomatoes grow! To make leaf mulch you can buy a leaf mulcher or smash them with a weed whacker or mower. It’s obviously July, so leaves aren’t expected to fall until autumn but garden centers often have leaf mulch piles people drop off for others to take. We certainly do! Give us a call before driving home to make sure we have bagged.
Regardless if you choose to add mulch you may have to water more as the heat increases. We recommend following Colorado Springs Utilities for watering times. But when watering, water deep. Use a bubbler sprinkler or slow-release irrigation system and water in intervals. This is so the water penetrates the soil and soaks deeper, ensuring lower evaporation rates. This also helps strengthen roots and drought immunity in the plant!
Fighting heat isn’t easy, Colorado is a semi-arid high desert after all. Not all tomatoes will survive super hot summers, but these cool techniques will help preserve them! Plus, these techniques can be used on other plants too, from vegetables to annuals!
“Colorado State University.” PlantTalk Colorado. Accessed June 26, 2025. https://planttalk.colostate.edu/topics/vegetables/1835-tomato-questions-abound-heat/.

Planning For Trees
Gardening is for everyone, and that includes those who want a tree! How can this be? Not everyone has the space for these kinds of big plants. Not so fast-trees also include bonsai and indoor citrus too! Whether you want something decorative, fruiting, or just plain cool, we will help you pick and care for a tree that will thrive!
What To Look For: Location, Location, Location!
Trees are surprisingly delicate plants. Selecting the right plant, planting it at the optimal time, and choosing the ideal location is crucial for a tree to thrive. We’ll first go over site selection. Trees need space both above and below ground. Their canopies need to spread alongside their roots so they can establish themselves easily and live a long time. Keep in mind a tree’s full size before purchasing. If you’re lacking this space, a dwarf tree variety or even a shrub would be better.
Drainage also is important. Most soil in Colorado retains moisture poorly, however there can be areas with poor drainage in any environment. Picking a drought-tolerant tree would be best for soil that poorly retains moisture, the very best being a native tree. For a tree in a wet area pick one that enjoys damp soil, just don’t forget to water during the drier months!
Lastly, sunlight exposure is essential for trees (and generally all plants). Generally, trees need full sun but some don’t like bright hot light and prefer partial shade. Most trees we carry in our nursery will have little information packets attached to their branches about light requirements. If they don’t, our Ricksters are always happy to help!
What To Look For: Healthy Trees Please!
Now we get to the fun part: picking out the tree! Picking a healthy tree will benefit your wallet and the health of your garden or yard. An unhealthy or sickly tree can transmit disease and decay to other plants, so knowing what to look for while shopping is essential for everyone! Tree leaves shouldn’t be wilting, have discolored bark, odd spots, or oddly colored leaves. You shouldn’t buy a tree that has non-beneficial insects, like aphids or mealy bugs, on its leaves, branches, or bark. Trees should have evenly spaced branches and a central branch that acts as the main trunk. The Colorado State Forest Service suggests, “Tree foliage and branches should be distributed on the upper 2/3 of the tree.” Study the tree roots too. Are roots circling, appear pot bound or are suffocating the stem and trunk of the tree? These are all bad signs and this tree shouldn’t be purchased.
Why Natives?
Some trees will do better in Colorado than others. Native trees in particular are hardier and built for our drastic climate. Generally, they will also need less maintenance, like less watering, pruning, and insect control. Natives will thrive in Colorado hardiness zones, though there are always exceptions. A great place to check out native trees and shrubs is at Colorado State University Extension. Alongside pictures, each tab is filled with information about the plant’s preferred elevation, habitat, and more. Click the link to learn more: https://csfs.colostate.edu/colorado-trees/colorados-major-tree-species/
Planting
Trees have specificities when it comes to planting. When you choose to purchase a tree from our nursery, we’ll typically send you home with one of our tree-planting guides. It’s also available on our website, link located here for ease: https://www.ricksgarden.com/wp-content/uploads/2021/04/Ricks-Tree-Shrub-Planting-Guide.pdf .
We want to remind you to NOT FERTILIZE your tree for the first year! This can damage and even kill a tree. Trees are getting established in their new home and this is a stressful time. Applying fertilizer adds unnecessary stress in the first year.
Whether you choose a flowering crab apple or go the native route and pick a tree that easily establishes in our area, finding the right fit tree is what we should all strive for. A chosen tree should be picked to thrive in your yard’s microclimate. Once established, trees return the favor. Providing shade, habitats for animals and birds, cleaning the air and water, and limiting rain runoff are just a few of the reasons a tree can benefit the community. Likewise, trees increase property value and cut noise pollution! Trees are legacy gifts to the environment and to future generations. Whatever your reason is for choosing a tree we’re happy to help you do it right. Happy gardening!

Preventing Water Loss
We understand it’s not easy to garden this year-especially with how expensive watering can be. Trust us, it’s no easy feat to maintain watering our plants either. But we don’t think you should have to give up gardening entirely. Knowing and understanding water loss will help prevent it, saving you money and protecting the environment! Gardening is for everyone and water costs shouldn’t stop you.
Reduce Evaporation
Colorado is notoriously dry. Combined with a hot summer, it creates treacherous environments for gardens. “Thanks to capillary action throughout the soil, which draws water up from below,” says Rhonda Massingham Hart, author of “The Dirt Cheap Green Thumb,” “evaporation can deplete water from deep in the ground.” If you don’t want water to leave your soil, mulch over the top. Gorilla hair maintains water the best and as a perk clumps, so it won’t blow away either. Another good mulch is straw! And if you lay gravel on top, which is also an excellent mulch, it will keep the straw down for you. Gravel mulch however retains heat. In the dog days of summer, this can lead to trouble. If you’re interested in free mulch and willing to work up a sweat, check out the cities free mulch pile: Click here!
Likewise, consider putting down a drip system or soaker-style sprinkler head. Sprinklers that disperse through the air lose more water than these close-contact irrigation systems. If you don’t have the funds for an irrigation system consider purchasing or making olla pots! This technique hails from ancient Northern Africa & China and involves an unglazed terra cotta pot used for underground irrigation. Due to the porous nature of the unglazed terra cotta, the water leaches slowly into the soil. And because the olla put is partially buried or almost totally buried underground, water is less likely to evaporate. To make your own gather terra cotta pots (they cannot be glazed), plug the drainage holes, and place a lid over the top of it. To learn how to make your own olla pot, watch this short video: Click here!
You can also use plastic containers, like old milk jugs, to create olla pots. Wash out milk containers then puncture three holes on the bottom with a hammer and nail, knife, or other cutting tool. These holes shouldn’t be large. Bury the container up to the neck and remove the cap. Fill with water, screw the cap back on, and viola! Plastic olla pot! Keep an eye on when to refill your olla pot and tailor the size of the container to the plant. This too goes for terra cotta olla pots.
Amendments & Native Plants
You can add amendments to your soil to retain and even attract water. Ever heard of humus? Humus is essentially composted plant and animal matter, yet it’s different from typical compost. Our brand of humus we sell is made only with plant product and is one of thew few vegan style compost we provide. Dark in color and rich in nutrients, humus is also excellent at conserving water. Its presence within your soil lessens water percolation and keeps it “in reach” for plants. Likewise, it also slowly releases nitrogen, sulfur, and other essential amendments to plants over time. If you’d like to learn more about humus, read this article and scroll to pages 212-3: Click here!
On hot summer days, plants sweat like us. “One large shade tree can transpire several hundred gallons of water through its leaves,” remarks Rhonda Massignham Hart. While this tidbit of information seems contrary to the information above about reducing water evaporation, misting plants on especially hot days will likewise retain water. This shouldn’t be done every day however, reserve misting for only the hottest and driest of summer days. Native plants are less likely to transpire as non-native because they are adapted to Colorado’s semi-arid climate. If you’re tight on cash for water yet are looking to plant something new, always always ALWAYS choose native. Not only will these plants be saving you money but also you’ll also be helping the environment by returning native plants to the ecosystem! Don’t be surprised if your plants attract more beneficial bugs, birds, and even larger wildlife. Here at Rick’s we’re especially focused on trying to increase our native perennial selection for this reason. If you want certain qualities of native plants, here is a great way to select what you want before shopping at Ricks: Click here!
Conserving water doesn’t have to be scary or expensive. With these hacks, you’re sure to save on your water bill. Here at Rick’s, we’re excited to share more gardening tricks and tips. No one should ever have to give up gardening due to money or to the environment. Gardening is for everyone!

Encouraging Kid’s Green Thumbs
There is a saying that “green thumbs are not born, they’re grown.” And here at Rick’s we heartily agree! Green thumbs come in all shapes and sizes, and even ages. Today we want to encourage younger green thumbs- kiddos! Kids are naturally attracted to dirt, worms, flowers, bugs, watering cans, seeds, berries and even veggies that are unique. It really is quite easy to get them hooked on becoming gardeners. Some may balk at including kiddos in the garden. What if they mess things up? I counter, adults also mess things up in the garden- often without trying. Let the kids learn, experiment, play and succeed in the garden. If you are a parent, teacher, guardian, devoted auntie, grandparent, or other care giver, these tips will get you started on introducing kids to the wide world of science and beauty of plants.
Gardening is an adventure into math, science and art. Math is used when discussing how far and deep seeds are planted, as well as in the conversation of, “If we have three eaters in our home, how many zucchini plants do we need to plant?” There is no right answer for this conundrum, because you typically end up with too many zucchini in general. But having that conversation with a child allows them to think of the production of one zucchini plant, how to extrapolate how many ways they and other eaters can eat zucchini, and to problem solve with what to do with any extras. Maybe the neighbor next door would like some?
Science takes a look at the immediate needs of a plant; nutrients, water and sunlight. But as a kiddo becomes more advanced in their gardening skills, you can begin talking about seed production, pollination, photosynthesis, soil biology, mushrooms, diseases, pests and the list goes on! Perhaps most importantly, it may be wise to share why gardening is so important to embark on in this time and age. This can cover creating habitats and safe zones for pollinators, building food sovereignty and security while avoiding supply chain disturbances, farming for the purpose of carbon sequestration, etc. And the variations on this theme grow infinitely from there.
Of course art goes hand in hand with gardening. Design and edibleness are dependent on aesthetic values. A child will love choosing pansies (some look like tiger stripes!), colorful zinnias, snapdragons, and other annual flowers for their container garden. Consider taking them through the perennials section for in season cut bouquets, including daisies, black-eyed Susans, Penstemons, and Yarrow. They may want to try purple carrots, purple tomatillos, purple beans or peas, or eggplants if the kiddo’s favorite color is, you guessed it- purple! Challenge them to create colorful dishes with the veggies you all grow. “Can you create an all orange meal? All green? Red? Can you have every color of the rainbow represented on your plate?” Growing vegetables for their colors is not only fun, it is healthy! Produce that have unique colors often are chock full of vitamins, antioxidants and other nutrients that we may neglect to get through our Standard American Diet (SAD).
Other ways to encourage the gardener in every child:
- Pick out seeds together to grow by inviting them to take a look at a seed catalog or a seed company’s website. If you are looking for wild and very colorful seeds, Baker Creek Seeds is a great start!
- Grow sprouts or microgreens if you are lacking space, but want a child to see the life of a plant from seed to germination to the plate. See our other blog this month for details on how to grow microgreens!
- Grow things that create awe and wonder like:
- Sunflowers
- Beans
- Pumpkins
- Small cherry tomato varieties (Spoon is a great variety, because it is abundant and kiddos love the “baby” tomatoes)
- Raspberries and blackberries
- Plant a tree, and talk through how trees are important for creating habitat, providing oxygen, cooling of the climate and are a generous resource for paper, fruit, and wood.
- Plant fall or spring bulbs for children who may need an example of delayed gratification. Plant the popular daffodils in the fall and watch them bloom in the spring. Or plant gladiolas now and watch them pop up late summer.
- Build an observation habitat: Plant flowers and other plants that will attract hummingbirds or other pollinators that the children love (butterflies, bumble bees, etc). Place a bench beside the habitat and have children tell you what they see, hear, smell, feel, etc. This prompts quiet patience and the building blocks for scientific inquiry.
- Begin a worm or compost bin. Collect kitchen scraps, shred old school work, or bills and throw in a generous community of worms. Children will be amazed to watch these items turn into worm castings, or worm poo, and how it can be used in the garden or with house plants.
A kiddo who eats their first carrot or snap pea from the garden will never forget that moment. While gardening is magical as a child, being an adult and witnessing the magic is priceless. Green thumbs can grow at any age and stage, but it is a true gift to give the love for gardening to a child. They have the rest of their lives to grow with it!
Rick’s Garden Center believes in the power of people and plants. All of our blogs and content are written and edited by real humans with their own unique creative perspectives. Any use of our publications to ‘train’ generative artificial intelligence (AI) technologies to generative text is expressly prohibited. Any typos or errors are our own
2025 Garden To-Do’s Recap 1#
Here are the gardening references we shared over the past month. We’re big fans of Colorado State University extension, so you’ll see us referencing them all the time. However, we also have some written articles just for you under our blog! There will be more gardening references for the year, so stay tuned!
Relative Houseplant Care/Rescuing House Plants:
Listen…shhhhh…if you listen closely, you can hear that neglected plant in the corner crying for help. You did not mean to cause harm. Whether you left for your holiday travels in a rush and failed to give your plants some extra TLC before you left, or you do not know the plant’s needs, the stress is equally killing you. You are at the point of not knowing what to do to make your plants happy again. No worries! We got you on our blog!
Starting Seeds Indoors:
We know it seems early, but the sooner you start your seeds the better. For tomato and pepper plants it’s recommended you start them outside once soil temperatures reach 50 degrees at night. This however doesn’t work well for Colorado’s short growing season. To get the most produce out of your vegetables we recommend starting seeds indoors now and in February! All you need is a seed-starting soil mix and a grow kit!
Seed Starting Troubles:
Have you been waiting for your seeds to pop up and still nothing? No matter what you do, your seedlings perish. There are multiple factors as to why your seeds may not be sprouting. Seed age, crusting soil, and temperature fluctuation are just a few. In the article below by CSU Extension, scientists review why your seeds may not thrive as they should. Fear not, solutions are provided to fix issues and to get those seeds growing! Happy gardening!
Winter Watering:
If air temperature is above 40 degrees it’s time to winter water! Read more about winter watering rules below!
https://www.csu.org/blog/winter-watering-tips
Do’s & Dont’s of Transplanting:
Want to get bang for your buck when starting transplants? Learn the dos and don’ts of growing transplants by copying and pasting the link below! And if you need containers we wanted to remind you we have a free drop off/pick up bin behind the store in our parking lot-perfect for starting seeds or other transplants (once they’re clean that is)!
Garden Planning:
Now’s a great time to start garden planning for spring! Remember to consider space when mapping your beds and companion plants! The links below will lead to more information about early garden planning and companion plants!
General Info:
Companion Plants:
General Onion Care:
Intimidated by growing and planting onions? How about storage, before and after planting and growing these flavorful bulbs? And what the heck does daylight have to do with all of it?
Among the hundreds of questions involving onions you may have, we’ve contacted the experts for their advice. Learn the essentials for onion care from Dixondale Farms!
Growing Potatoes at Home:
Want to try growing potatoes this season in your home garden? We have a link for you! We recommend reading Colorado State University article on the subject!
https://extension.colostate.edu/topic-areas/yard-garden/potatoes-in-the-home-garden-7-617
Spring Bulb Care:
Intimidated by growing spring bulbs? Don’t be with Colorado State Extensions help! Learn how to keep beautiful spring bulbs, corms, and roots alive by reading the article below or in our story/highlights. The article provides everything from choosing a perfect planting spot to planting depth for certain favorites Happy gardening!
https://extension.colostate.edu/topic-areas/yard-garden/spring-planted-bulbs-corms-and-roots-7-411
Rick’s Tree Planting Guide:
We know many of you are familiar with our Tree Planting Guide, so here it is again! This guide is perfect for those interested in buying a tree or about to plant a new one. We also sell mulch, root stimulators, and mycorrhizae for tree planting! Happy gardening!
https://www.ricksgarden.com/wp-content/uploads/2021/04/Ricks-Tree-Shrub-Planting-Guide.pdf

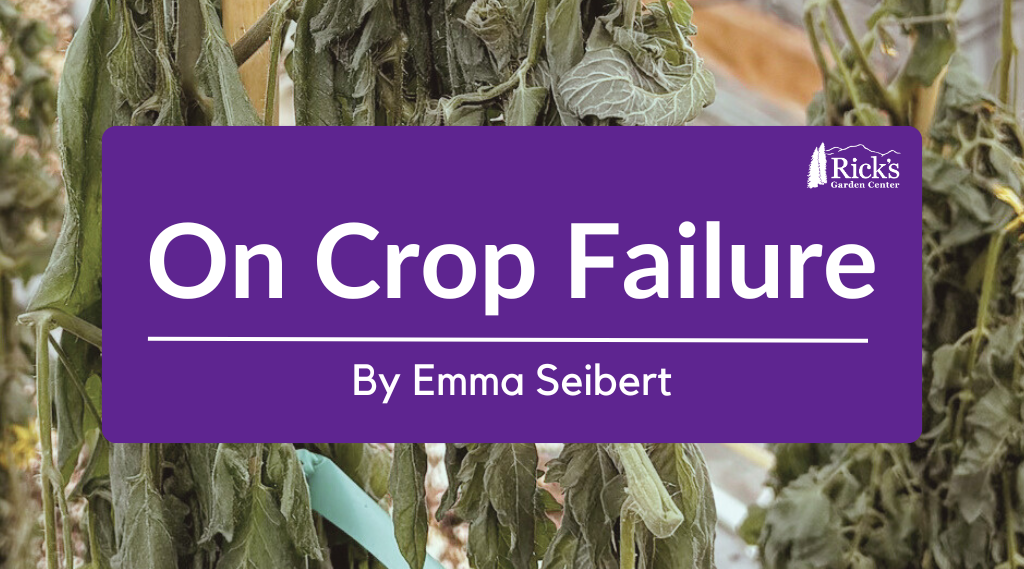
On Crop Failure
By Emma Seibert
A few nursery Ricksters had been growing tomatoes in our greenhouses this winter as an experiment. In hopes of helping gardeners sample certain varieties before they commit to growing, nursery crew member Emma was dedicated to growing tomatoes and selling them as produce over the winter. Accidents happen to the best of us, however, including garden centers. Though crop failure is tragic, it’s not a sign to stop growing. Rickster Emma will talk you through her recent experience with crop failure…
A regular part of my job, especially in the summertime, is helping customers troubleshoot the issues they are seeing with their vegetable gardens and flower beds. Sometimes customers come in and I am able to recommend different caregiving techniques that can help bring their plants back to full health. Other times, I have the unfortunate job of bearing the news that the plant in question is either beyond saving, or even more heart wrenching, that it is dead. And that is what I wanted to talk about today. Dead plants are a rather sensitive topic for most growing enthusiasts; whether you’re a farmer and the health of your crop determines your livelihood or you’re just beginning your houseplant collection, crop failure is painful.
On August 26th, 2024, I seeded 32 tomatoes to plant them in large farm troughs in one of our greenhouses, with the intention of sharing the organic, local greenhouse-grown fruit with you all during the cold winter months. We wanted to provide our community with locally grown, ‘out of season’ produce that was flavorful and that you all could feel good about purchasing, knowing exactly where it was grown.
On January 13th, 2025, the tomato plants were nearly touching the roof of the greenhouse. They were blossoming and nearly every plant was fruiting. The green globes that hung from the tender stems had a yellow hue, indicating that ripening was mere days away. The stripes on the Purple Bumblebee tomatoes were starting to darken and the folds in the skin on the Sub-Arctic Plenty were beginning to smooth out, firming up the skin and giving it a glossy appearance. The first harvest date was so close I could nearly taste the tang of the Sweetie cherry tomatoes.
Then that same evening, the heater in the greenhouse wouldn’t turn on, despite the thermostat readings dropping. For some reason the thermostat and the unit heater were not communicating, but we couldn’t figure out why. As I got in my car to go home that night, I tried to remain hopeful that something would kick on, that someone would be able to figure out what was wrong in the next 20 minutes before the store closed for the night; all while watching the temperature readings in my car drop below 32 degrees.
The morning of January 14th, I hustled to the greenhouse as quickly as I could. Before I could even open the door, I knew it was done. There was frost coating the inside of the greenhouse walls; it had gotten cold enough inside for the condensation from the previous day’s healthy plant transpiration to freeze, indicating to me that every tomato plant inside must be frozen too. I went inside anyway and saw what I already knew to be true; every beautiful plant was frozen in time. The leaves were slightly wilted but maintained their vibrant green color, iced over in the moment of their last breath. It turns out that the safety fuse in the greenhouse heater blew out the previous day, preventing the heater from turning on despite the thermostat telling it to do so. We were unable to replace it in time for that night’s low of 10 degrees. As the daytime temperatures rose, the cell walls thawed and tomato plants flopped in defeat, their fruit turning to mush in my hands.
I cried, really hard. For a long time. I am not telling you this story to make you sad or say woe is me and my little crop of tomatoes. I am telling you to try to be of comfort; crop failure happens and hurts at every stage. I am telling you because I want you to know that yes, crop failure is a fact of life in the horticulture world. And also, the pain associated with such loss is a fact of that life too. So if you come in to show me your plant that is struggling and I tell you that it is dead, know that I understand that pain too. And I will do my best to help you pivot your crop, like I did with mine.
After the sore task of digging up all of the spent tomato plants, I went back and seeded some other, more cold-tolerant crops. And soon, the greenhouse will be a miniature forest again, but this time of kale and spinach, lettuce, and Swiss chard. I am not perfect, and neither are you, and neither is anyone no matter the extent of their experience. We all have to pivot sometimes and just know that the pivot can be the seed for new success.
January 2025 Recap
Monday: Rick’s Highlights
On Mondays, we like to post about things happening around the store! There will be LOTS MORE in February!
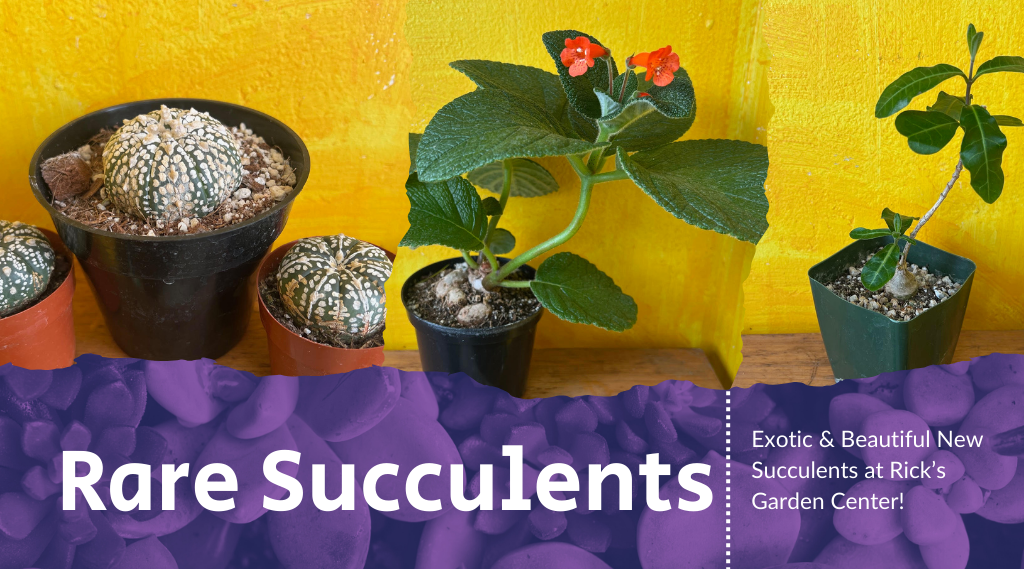
Astrophytum asterias Superkabuto
- Originate in Northern & Central Mexico!
- Sought out due to their beautiful white spotted patterns and semi-fuzzy texture.
- Occasionally even flowers! Flower color is white.
- Maximum size is about equal to a baseball!
Sinningia Hybrid
- Comes from Brazil!
- A perennial hybird of two different Sinningia, equates to a hardier plant!
- Similar to African Violets in terms of light needs.
- Misting soil required if plant goes dormant.
Raphionacme flanaganii
- Native range its from Kenya to E. South Africa.
- Produces vines that reach to 3′ long.
- Enjoys partial sun and shade.
- Occasionally blooms small fragrant flowers that green with a burgundy center.
Calibanus hookeri
- Native to North Central Mexico.
- One of only two species in genus, making this plant VERY RARE!
- Related to Ponytail Palms, somewhat pet safe.
ALL OF THESE PLANTS ARE CURRENTLY FOR SALE! We have a limited quantity, so hurry in before they’re gone!
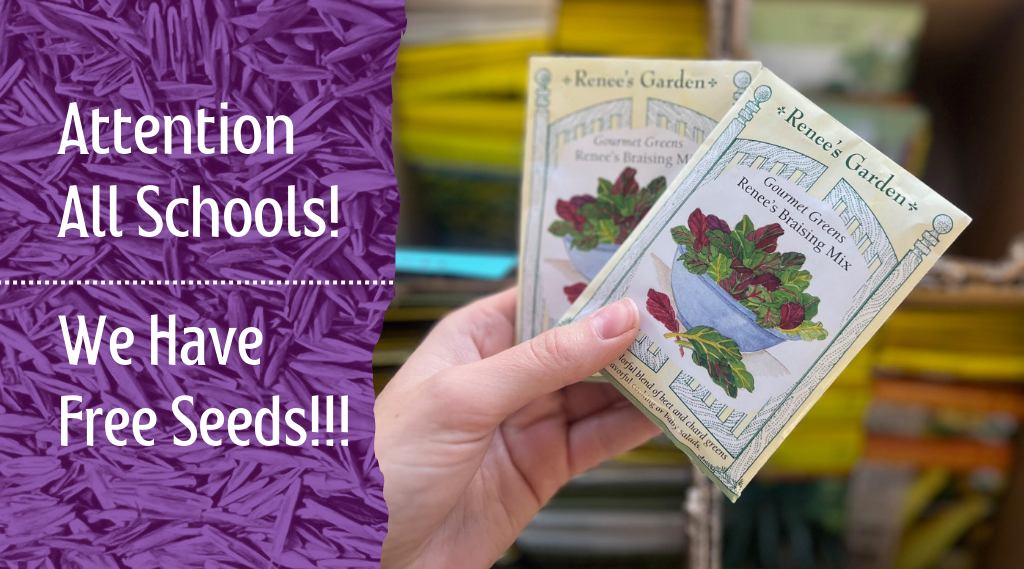
A select group of seeds are 2024 stock, so sales-wise they’re considered “expired.” However, that doesn’t mean they won’t sprout! We like to give our “expired” seeds away for free to places that need them, such as schools and other community centers. If you’re school is interested in seeds, please come into the store and show your school ID or community center ID at the front desk! Happy gardening!
We have both flower & vegetable 2024 seeds!
Tuesday: None
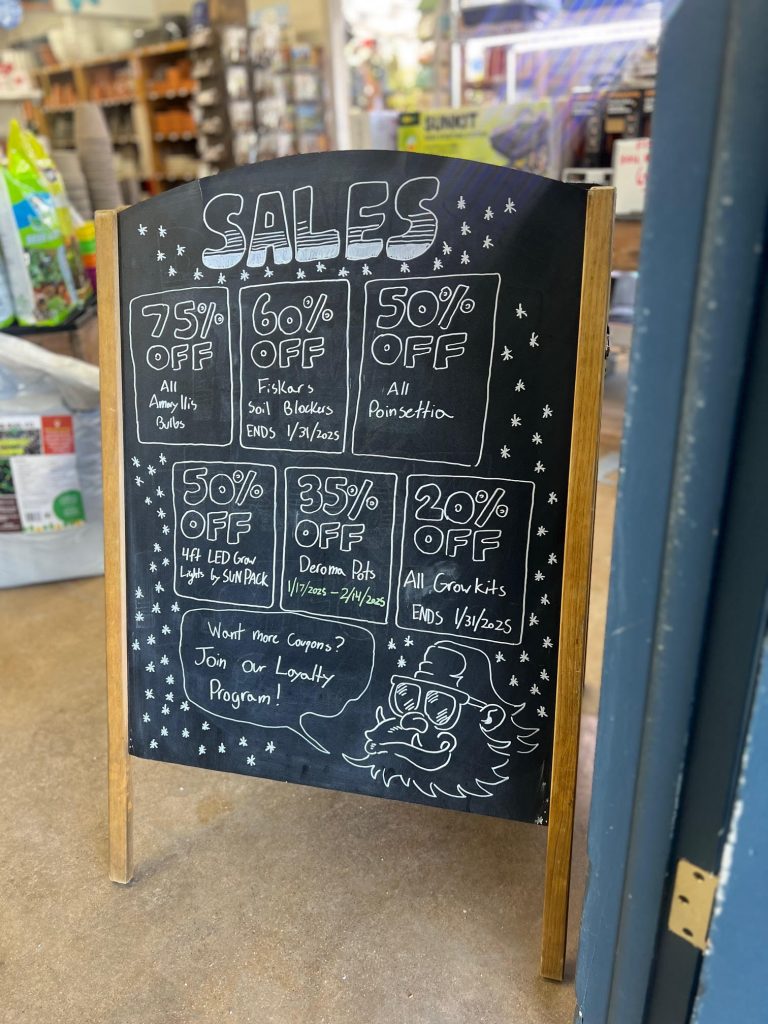
Wednesday: Sales
Thursday: Wild Card Days
Friday: Garden To-Do’s
Winter Houseplant Care: Listen…shhhhh…if you listen closely, you can hear that neglected plant in the corner crying for help. You did not mean to cause harm. Whether you left for your holiday travels in a rush and failed to give your plants some extra TLC before you left, or you do not know the plant’s needs, the stress is equally killing you. You are at the point of not knowing what to do to make your plants happy again. No worries! We got you on our blog! Click here to read!
Seed Starting Indoors: We know it seems early, but the sooner you start your seeds the better. For tomato and pepper plants it’s recommended you start them outside once soil temperatures reach 50 degrees at night. This however doesn’t work well for Colorado’s short growing season. To get the most produce out of your vegetables we recommend starting seeds indoors now and in February! All you need is a seed-starting soil mix and a grow kit! Click here to read!
Starting Seed Troubles?: Have you been waiting for your seeds to pop up and still nothing? No matter what you do, your seedlings perish. There are multiple factors as to why your seeds may not be sprouting. Seed age, crusting soil, and temperature fluctuation are just a few. In the article below by CSU Extension, scientists review why your seeds may not be thriving as they should. Fear not, solutions are provided to fix issues and to get those seeds growing! Happy gardening! Click here to read!
Saturday: Plant Factoids
Interesting gardening and plant facts! We include sources, so in case you want to learn more you can find that information!
“Proper light levels are important for the health of the rubber plant. They do best in medium to bright filtered light. Unfiltered, direct sunlight can damage leaves.”
-“1326 – Rubber Plant – PlantTalk Colorado.” Colostate.edu, 2025, planttalk.colostate.edu/topics/houseplants/1326-rubber-plant/. Accessed 18 Jan. 2025.
“Only feed or transplant a Norfolk pine (Araucaria) when they are actively growing (March through September). To supply nutrients any standard soluble fertilizer formulated for houseplants will do. Araucaria are slow growers and only need to be transplanted when they show signs of being root bound or have roots growing out the base of the container.”
-“1321 – Norfolk Island Pine – PlantTalk Colorado.” Colostate.edu, 2025, planttalk.colostate.edu/topics/houseplants/1321-norfolk-island-pine/. Accessed 25 Jan. 2025.
“Seedlings in soilless mixes need regular fertilization. Apply a water-soluble fertilizer at half-strength a week after seedlings germinate. Then fertilize every two weeks at full strength.”
-“1840 – Starting Vegetable Seeds Indoors – PlantTalk Colorado.” Colostate.edu, 2025, planttalk.colostate.edu/topics/vegetables/1840-starting-vegetable-seeds-indoors/?_gl=1. Accessed 1 Feb. 2025.
Sunday: Highlighted Products


Getting Home & Garden Ready For Sale
Despite mortgage interest rates continuing to climb in the past several months, in this military base-saturated city, we continue to have a thriving real estate market. If you are prepping a house for sale, know that it does not have to be scary! Historically most house sales occur in the spring, so the later winter months are the perfect time to begin thinking about how to improve your curb appeal and get a “to-do” list fleshed out in time for your spring sale. Sprucing up your yard is especially important.
The first thing you should do is take your blinders off. You probably have lived at your house for some time. Pretend you are pulling up to the house for the first time or walk by your house like you are new to the neighborhood. Take notes. Like an artist, you will come back to this step multiple times, building a masterpiece!
- Do you have a couple of ways your eye can “travel” through the landscape? If not, how can you add interest in multiple areas of your yard?
- What are the immediate eye sores? Clean those up or remove them immediately.
- What is the highlight of your home and yard? How can you further accent it?
- What trees or shrubs need to be trimmed?
- Are there holes in the landscape? Can a tree, shrub, ornamental grasses, several perennials, or a boulder fill in the gaps?
The second thing that is helpful to do right now is a general yard cleanup. Even if your yard is ho-hum, an easy way to elevate the place is to do some general yard maintenance.
- Clean pathways/ sidewalks by sweeping dirt/ debris or pulling weeds
- Rake leaves off your lawn. Leaves can be mulched into your lawn also, by running a lawn mower over them.
- Remove any weeds. Pulling is preferred especially now, when they are most likely dead. Feel free to put a natural pre-emergent down, like corn gluten. This will prevent weed seeds from germinating in the spring.
- Pruning should be done in the spring, but take note of which trees or shrubs should be addressed before your sale.
- Consider if outdoor statement containers should be purchased, so you can plant vibrant flowers ahead of putting your home on the market.
- Add a fresh layer of mulch or gravel to refresh any landscaping areas. Do not forget to put a weed pre-emergent down under the mulch and on top of the new mulch, to discourage weed growth. There is nothing more aggravating than completing a clean landscaping job to have weeds pop up in the spring. You can also consider laying down weed barrier fabric under the mulch.
- It should also be mentioned that you should remove any yard art that is specific to your “aesthetic.” You want potential buyers to imagine their own lives when doing a home walkthrough. Pack the garden gnomes away for when you move into your new place!
Next, you will want to address outdoor lighting. If you plan on selling in the spring, you will be hitting the market before it is light in the evenings. You will want to ensure that you make your house feel welcoming as people come to showings after getting off of work.
- Highlight your entrance. This is the most important area to highlight. If you are concerned about light pollution, make sure the light casts downward, instead of out or upward. If you are further interested in reducing light pollution at your home, check out this resource on what light fixtures are best: Click here!
- Other areas to consider lighting include pathways, the address number on your house, and any architecture or plants you want to illuminate.
Finally, consider your plant life. You will not do any planting until spring, but this is a wonderful time to find plants that will fit your needs. In the first step, you identified if your eye traveled through the house/garden lay out, if there were any highlights, and if there were holes in the landscape. As you choose plants to fit these roles, consider the following:
- How much water does it require? Will you be able to ensure it gets the water it needs until you sell? Will potential buyers be turned off by the amount of water that you use? Consider more xeric or water-wise options, if this is the case.
- How much maintenance will it require? For example, many younger buyers are no longer interested in lawns, due to the regular, watering, fertilization, aeration, and mowing that a lawn requires.
- If you have deer or rabbits in the neighborhood, consider choosing species that are resistant to their munching, so all of your plants look good for your closing!
- Resources that are helpful when selecting native plants or water-wise plants are detailed below:
- Plant Select is a brand of plants that we sell. They have an excellent variety of plants and detailed descriptions of each plant. They specialize in plants that are, “…unique, smart, and sustainable plants inspired by the Rocky Mountain region.” Check them out here: Click here!
- High Country Gardens is another gem of information. They “…offer a diverse and ever-expanding selection of plants for the unique challenges of Western gardens.” Use their perennial filter to drill down to find those difficult-to-find plants that are deer-resistant, in partial shade, water-wise, and good for your zone. Check them out here: Click here!
- Finally, a local resource. Please check out the water-wise demonstration gardens that the Colorado Springs Utilities have. They have two different locations listed below. All of the plants are labeled, which is helpful when you find a plant you have fallen in love with! It is helpful to go visit through the four seasons, so you see how foliage and plants change throughout the year. Check them out here: Click here!
There you have it! Good luck with getting your property ready for sale!

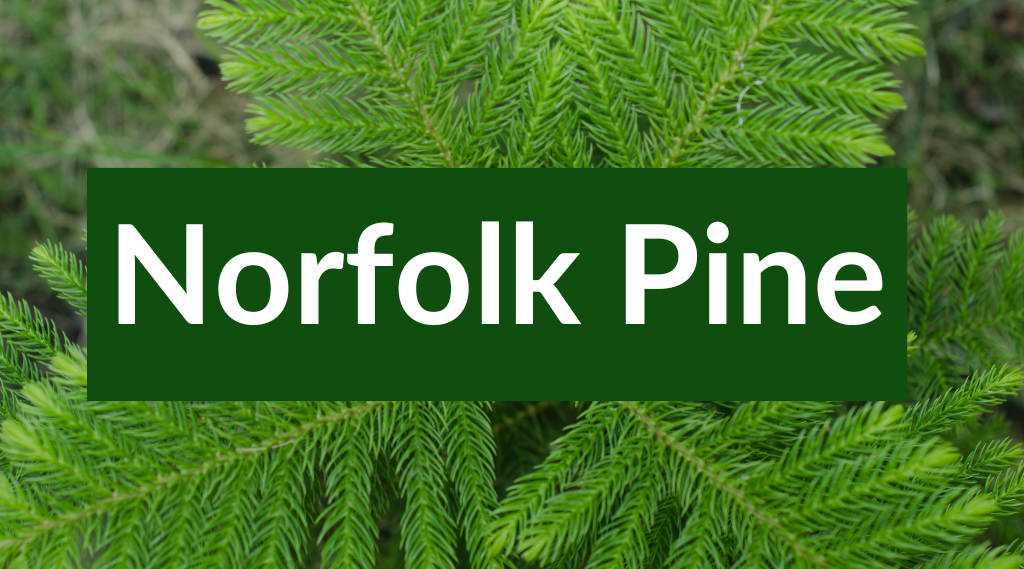
Norfolk Pine
Ah- the Norfolk Pine! The perfect gift for someone who has just moved into their first home around the holidays. The Norfolk Island Pine is also an elegant house plant to welcome into a home for year-round interest!
Also known as Araucaria heterophylla, this plant is not a pine at all. Beautiful and graceful, the Norfolk Pine was originally found on Norfolk Island in the South Pacific, adjacent to Australia. This island is the only natural and known occurrence of the plant. This conifer evergreen tree keeps a symmetrical and compact habit. Due to its branches that present a spiraled and stepped appearance, the tree has a tidy and pyramidal canopy. The needles are fine and almost fern-like, adding a delicate touch. It is so easy to fall in love with this tropical tree! Below you will find care tips for this unique plant.
Moisture:
Norfolk Island Pine’s native habitat is tropical and very humid (50-60%). Our climate is difficult for them, so supply additional humidity through daily misting, a humidifier on a timer, or a humidity tray (set your plant on a tray of water with pebbles). The Norfolk Pine does not like their roots to be waterlogged so make sure you are not over-watering, only watering when the top inch of soil is relatively dry.
Light:
Colorado has very bright light. The Norfolk Pine prefers bright indirect light. Place a Norfolk Pine by a window that receives a good amount of light, but shift the plant away from any direct light, since they are susceptible to sunburn. Many people find that a west or east-facing window is the perfect spot!
Temperature:
Araucaria heterophylla needs a temperature range between 60°F and 70°F. Do not place this tree by a window that transfers cool air inside or a heat vent that could cause scorching or excess drying out of the plant, and its needles. Even slight fluctuations in temperatures can cause stress, so make sure to keep your Norfolk Pine under careful watch. The first sign of stress is needle drop or loss of lower limbs. These lost limbs will not grow back.
Soil:
This beautiful tree would enjoy a well-draining potting mix. The key is moisture retention without becoming waterlogged. Consider a blend of peat moss or finished homemade compost, perlite, and sand. We often also recommend fine-grade orchid bark instead of perlite, since this mimics its native soil.
Fertilizing:
Since Norfolk Island Pines are very susceptible to burning by other means, it should be expected that it’s sensitive to nutrient burn as well. To combat this risk, it is recommended to only fertilize during the growing season (spring and summer, here), and with a diluted half-strength water-soluble fertilizer formulated specifically for house plants. The cadence of fertilizer application is roughly once a month.
Other notables:
The Araucaria heterophylla is sensitive to changes in its environment. Swings in temperature, changes in light intensity, and even moving the plant to different rooms can elicit needle drops. Another thing to note is that this plant is difficult to transplant. We typically recommend delaying transplanting into a larger pot for as long as possible. It is also preferred to up-pot during the growing season. With other houseplants, we usually recommend transplanting into a pot 2 inches larger than the existing pot. For Norfolk Pines, we recommend a pot up to 4 inches larger than its original sized pot. This allows you to reduce the number of up-pots the tree will experience in its lifetime.
While it is hard to keep tropical species like the Norfolk Pine happy in Colorado’s climate, it is well worth it. This tree is festive in the winter months, and a beautiful companion the rest of the year!
