AI & The Garden: A Hard NO
If you’re a gardener, you should be aware that relying on AI can be dangerous. Running the AI data centers are detrimental to the environment, consuming 10 times the normal electricity compared to other search engines (UNEP, 2024). And what’s the point if it’s inaccurate? We’ve had numerous issues with AI spouting nonsense to all our wonderful customers and we don’t want your gardens, landscaping projects, or interior decorating ruined because of it. In this article, we’ll go over how to spot AI and what to use instead.
AI is transforming the plant industry at an exponential rate and not for the best. Sure, you can get information about plants, gardening techniques, and more using Chat GBT or a AI-run plant app but how accurate is this information? AI pulls its data from various sources across the internet, from downloaded books to “even those funny Reddit threads” (Climate Vault, Dec 2024). We’re sure you can recognize a red flag here: AI pulls information from ANY data online. AI can be trained to select data from certain sites but it can’t differentiate between reliable and unreliable sources. This leads to false information being shared on plant apps, the Google search settings, and even AI-generated images as fact. We can’t tell you how frequently misinformed customers come in because of AI. We have a good rule of thumb to keep in mind when it comes to AI identification: if it’s too good to be true, that’s because it probably is.
Too Good To Be True
Have you been recommended home remedies to care for sick plants? Or have you been shown images of plants that seem unreal, like deep blue leaves or neon magenta flowers that glow? These are all examples of AI displaying “too good to be true” facts and images. Gardeners in the know are aware there’s no such thing as a fully blue colored plant, that’s impossible because plants absorb light from blue and red light waves and reflect the green wavelength. Some plants appear blueish or even purple yet are never the color displayed by AI, exemplified below. Another sign (and poor recommendation) of AI is through plant apps’ advice. As we mentioned before AI absorbs and relays information from collected data all over the internet, including from memes (online jokes), unprofessional advice from Reddit and other websites, and non-scientific sources. AI in plant apps thus recommends that knowledge be treated as fact when it comes to identifying or recommending products to treat sick plants. Customers come in all the time with spotted leaves on houseplants and outdoor plants and through a plant apps “advice” been recommended inappropriate care, like supplying fertilizer when it’s a fungal issue. The fertilizer might help the plant bounce back but doesn’t eliminate a fungus, only a fungicide will do that. AI will also recommend homeopathic “remedies” for plants based on this collected data, like using honey to stimulate root growth on cuttings or using dish soap to treat for insect eggs. Sounds too good to be true right? You are correct, these claims are advertised as cheap but aren’t rooted in science and are often pulled from untrustworthy data. Honey has been shown to have limited effect, but very minimally, and rotting often occurs before root take a hold. And using dish soap on plants will kill your plants before killing insect eggs. Seasoned gardeners and plant people would be suspicious of these recommendations but those new to the lifestyle may be caught unaware and taken advantage of.
How to Spot AI Via Images
AI learns and thus it becomes increasingly difficult to differentiate real photos and AI-generated photos. Realistic but not perfect, thankfully there are still techniques to spot AI in photos:
Strange Details: Focus on the details of a photo you question. Are plant leaves melding together? Or do flowers seem way too bright? Almost glowing? No matter how small the detail something will be wrong with its appearance, indicating AI-usage. Data is collected and generated into a new image yet AI isn’t tuned enough to make it appear natural. Another great detail to look at is if a blossom appears identical to another in the picture, AI is essentially just copying and repeating the same feature in one photo.
Too Perfect: Aesthetics are important when it comes to internet images. Things must be perfect and AI tends to make things too perfect. AI-generated photos tend to lack realistic details, forgetting about the tiny hair like roots of a potted plant or a certain leaf pattern, instead giving an airbrushed appearance to the photo. Or the background environment might be incorrect for the plant featured in a photo, like tomatoes being displayed in a cold setting. Too perfectly aesthetic are red flags and their source, information, or appearance should not be trusted.
These are only techniques to handle photos, however. Rely on the professionals, like academics and scientists, for plant knowledge.
How to Spot AI: Discovering the Source
There’s a final trick up our sleeves for discovering what images or data snippets are AI-generated or not and it involves a little extra work. Are you familiar with the reverse image search?
Google Image Search: Have you ever downloaded a plant picture and are suspicious of its authenticity? Introducing the Google Image search. Simply open up a tab in Google, click the little camera in the search bar, upload that mysterious picture and you should be able to trace its origin. If the image comes from an academic source, a college, a published research magazine, or an established agricultural company chances are the plant displayed in the said photo is the real deal. If the image is tracing back to a single source and it’s on a shady website or a single page on Amazon chances are not only did you stumble upon an AI-generated image but it’s being used in a scam. Distrust the photo immediately and continue to rely on the professionals.
The Professionals: Who to trust
The best sources for plant advice ALWAYS come from professionals: academics, scholars, and scientists. Academic websites, university & college websites, scientist-run online journals and blogs, and more are all excellent places to source plant information and research. Science is evidence-based, meaning scientists study topics through experimentation. To think about the reliability of science is to think about the reliability of the car. “Most of us trust our cars, ” says Naomi Oreskes, a professor of the history of science at Harvard, “The modern automobile is the product of the collected work and wisdom and experience of every man and woman who has ever worked on a car. And the reliability of the technology is the result of that accumulated effort (Oreskes, 2017).” Real people analyzing trusted research, not just general data, is why science and thus academia should always be trusted and referenced. AI has no peers to check it and keep it real, though in time that may change. But in the meantime stick with the professionals.
We Ricksters use Colorado State University Extension as our main source for information. There are hundreds of free articles on whatever subject you could imagine. And there’s even a Q&A panel where you speak with real researchers, not an AI-driven help bot! To check them out, click these links:
Colorado State University Extension Page: CLICK HERE!
Colorado State University Extension Q&A: CLICK HERE!
Another great source of FREE information is the library! A librarian may not be a gardener but they’re trained in the art of finding trustworthy sources and good material. Use them or the library’s search features to hunt down trustworthy authors and information.
From college websites to libraries, there are numerous trustworthy sources for your plants. And even though AI is learning every day and becoming better, no one can do it like the pros. Plus, AI is bad for the environment, and using it is not cool. It uses thrice as much power as normal search engine, uses rare earth materials, and produces crazy amounts of electronic waste. Happy gardening and happy researching!
Sources:
“Industry News from 3BL Media: The Impact of AI on Carbon Emissions.” My Green Lab, December 4, 2024.
“AI Has an Environmental Problem. Here’s What the World Can Do about That.” UNEP. Accessed July 7, 2025.
Oreskes, Naomi, “Why Should We Believe In Science,” TED Radio Hour, February 24th 2017, 13 Minutes.
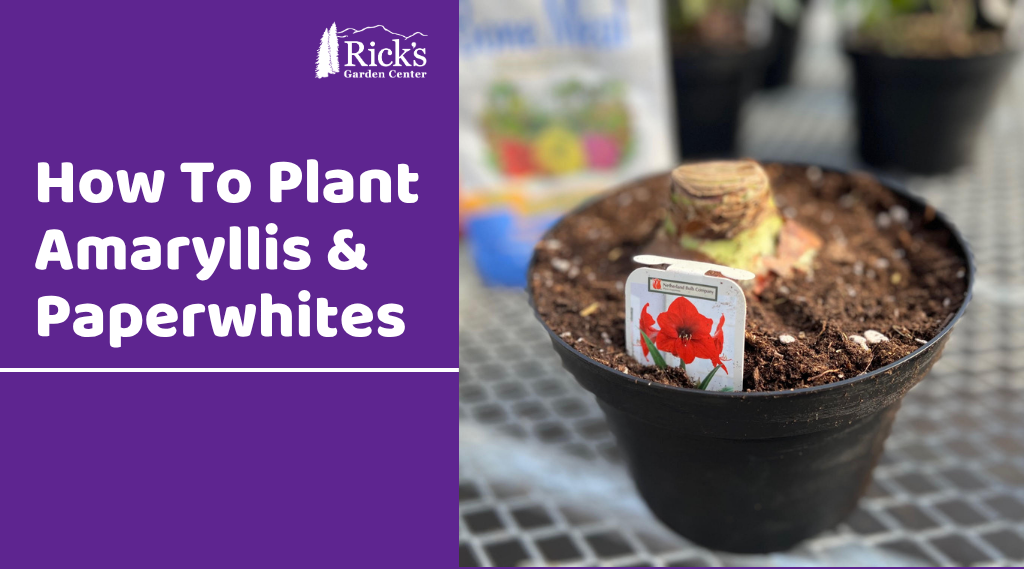
How To Plant Amaryllis & Paperwhites
Our holiday bulbs are here! Make way for Amaryllis & Paperwhites! Because these plants need to be planted about eight to ten weeks in advance, to flower around Christmas, we thought we’d provide this care guide now. Caring for and planting these bulbs is surprisingly easy!
How To Plant Holiday Bulbs
Ingredients:
-Bulbs, one Amaryllis or ten to eight Paperwhites.
-Well-draining soil (we’re using Fertilome Ultimate Potting Soil).
-8 Inch Container.
-Bulb fertilizer (we’re using both blood meal and bone meal).
Step-By-Step Guide
1.) Let’s start with the substrate. To prevent rot, pick soil with excellent drainage for these bulbs. We prefer Fertilome Ultimate Potting Soil, but Fox Farm’s Happy Frog works too. Gardners occasionally plant Amaryllis in a succulent mix, replicating their natural arid environment. Be cautious with this approach because it requires more watering due to extremely well draining soil.
2.) Once your soil is selected, fill about two-thirds of the container of your choice. Here, for both paperwhites and amaryllis, we’re using an 8 inch nursery injection pot. But you can use any kind of container. Having a hole for drainage is essential, and bulbs need some wiggle room.
3.) We advise fertilizing bulbs with a slow-release organic fertilizer. Whilst bulb-specific fertilizer, like Espoma Bulb-Tone, is ideal due to phosphorus levels, a flower fertilizer likewise works. Here, we choose to use blood meal and bone meal, high sources of nitrogen and phosphorus. We’ll eyeball the amounts because with them organic and a slow-release fertilizer burn isn’t a high concern.
4.) Plant your bulbs! Make sure roots are pointing down to the bottom of the pot, tip pointing to the sky. In fact, about one-third of the top of the plant should be above the soil. Amaryllis should have an inch and a half of space around the bulb and enough depth to properly root out. Paperwhites can be planted close together, but bulbs shouldn’t be touching. Think of how an egg carton is arranged! They should also have good depth for their roots to grow.
5.) Now, give the bulbs a light water. This helps pack them in. Rot is the primary cause of death for bulbs, so maintaining a good watering schedule is essential for their survival. We recommend watering every other day in a dry environment, less so in a humid environment. Lower watering to once every four days once green sprouts appear.
A Visit To Scotland: Learning About Gardening From The Scots!
By Katherine Placzek
Recently, I was able to go to Scotland for vacation. While I was there, I was blown away by the plant life, of course, but I also learned so many new ways to garden! In this blog, I want to share my main takeaways with you!
- Plant Small
I was able to briefly chat with someone who worked at McLaren’s Nurseries in Lugton, Scotland. This man told me that most of their plants are grown in smaller sizes because Scotland’s conditions are very harsh. They deal with a lot of wind, adverse weather, and salt from the ocean. With these conditions in mind, they think younger and smaller plants have a better chance of successfully transplanting and thriving. Many plants have severe transplant shock if they are larger. This made me think of what I have discovered on my own. Starting plants by seed or in smaller sizes in our harsh region has proven incredibly prosperous for me. I believe the premise is the same here in Colorado!
- Plant Wildflowers In Your Yard & Even In The City Roundabouts
The Scots are pollinator warriors! They interseed their lawns and roundabouts with wildflower seeds. They will mow a neat border, following the perimeter of the curb or the boundaries of their yard. BUT they leave the interior tall with poppies, scabiosa, daisies, other small wildflowers, and grass seed heads. It feels like a bit of the countryside has been transported into the heart of the city! I was happy to see bees and butterflies, as well as birds, enjoying the small habitat. What a beautiful way to encourage a little bit of wilderness into your yard, while keeping it tidy.
- Honor The Weeds
Scotland’s national flower is the thistle. The thistle. You read that right. We Americans have a vendetta against weeds- I just sold some Thistledown (a broadleaf chemical control for Thistle and its cousins) this morning. We do not see how beneficial weeds can be. The Scots have a different approach. Thistle is everywhere! In yards. By the sea. In the pasture. In the Highlands. Growing in a crack by a restaurant. It is honored in all forms of artwork in Scotland. It is found on postcards, in small artist studios as their main muse, below the statue of William Wallace in Sterling, and even on the handle of the sword of state held in Edinburgh Castle (gorgeous- btw). And it is not just thistle. They allow and sometimes even encourage the brambles- the wild blackberries. Brambles are by a stone wall overlooking the ocean. They skirt the perimeter of a park. They creep along the edges of a city forest. They climb over a rock wall where a couple of tourists are eating lunch. The brambles are even sometimes featured in local alcohol with the phrase, “sun-kissed bramble fruit.” All of these little corners where weeds are allowed to thrive remind us that we are part of nature, despite how much we try to separate ourselves. Pollinators and other wildlife benefit from these little habitats, also!
- Garden Even If The Plant Will Not Stay Perfect
I was able to visit many seaside towns in Scotland. While some shops and gardeners had given up on planting in the sea-sprayed side of town, many had not. They still planted window boxes or patio pots with begonias, impatiens, salvia, petunias, and the like. Many of these plants are not resistant to the salt in the seaside wind or spray from the ocean. There were pots that were protected from this, and they looked great, but others got the full brunt of the sea and looked very ragged or brown. It reminded me of Colorado. While we could throw up our hands and say that we live in the land of hail, deer, squirrels, and grasshoppers, and that “this is no place to be a gardner” we do not. We replant our tomatoes after hail. We install semi-permanent cages around tender trees and shrubs from the nibbling deer. Gardeners will garden, no matter the conditions. We believe in plants and we believe in beauty. We plant even if we know that the planter full of beautiful flowers will not stay perfect forever.
- Plant A Hedge
Hedges were the first fences. They border the road and soften sound pollution in Scotland. Hedges also create boundaries along property lines and offer privacy. I think that more hedges should be planted here in Colorado. While hedges sometimes are monocultures of one plant or shrub, they can also be very diverse. I saw Scottish hedges with cotoneasters, privets, various plants from the prunus family, shrub roses, beeches, etc. While many of these hedges were manicured, they had incredible diversity. Again, a variety of pollinators and other wildlife could find food and shelter in these hedges. If you are not into the “traditional hedge” that is trimmed into straight lines, feel free to check out Floret’s hedgerow guide. I think it is an excellent “new world” take on an “old world” idea. You can find that guide here: Click me!
Although building out a hedgerow can be expensive, if you go back to the first point (#1- Plant small), you might have a much better success rate and a less expensive ticket at the end of your hedgerow project. Some nurseries will even ship small seedlings if you want to start very small.
While Octorado Native Plants Nursery is only Wholesale, more nurseries are heading this way! Read more here!
- Plant In A Pot
Many people live in cities in Scotland, and you would expect those who live in small apartments or places without a yard to forgo gardening altogether. Not at all in Scotland! Window boxes and patio pots adorned nearly every block. Some may have been neglected or battered due to sea salt, but plant life was abundant and encouraged even in apartment living. Gardening really is for everyone!
- Develop Around What Already Exists
While Europe is known for its broad-scale deforestation in its historical past, we did see several old trees or portions of forests left intact. We saw an ancient yew tree that was the size of a building! This was in the middle of the city, Stirling. It was sitting close to a parking lot and was in the middle of the hubbub. This made me realize that city developers had left the tree. They purposely designed the parking lot around the tree. When development occurs in the States, oftentimes, we scrape the entire lot and then re-landscape with smaller trees and shrubs, denuding the lot of any remnants of what was there originally. I personally think this is sad. Think of the stories that you are removing from the land to put in a new shopping mall or a suburb. That yew tree had to be at least a century old. What a life to preserve and honor! I am glad someone decided to leave the yew tree.
- Make Plants Part Of Your Weekly Ritual
We were able to visit the city of Glasgow’s Botanical Gardens on a Sunday. While I know botanical gardens are not typically free in the States, these botanical gardens were free! It was packed. Small and large clusters of people walked the paths, exploring the grounds or the glass greenhouses, and lounged in the open spaces. Many of these people were locals, and this is how they had chosen to spend their leisure time. We also saw Scots recreating in the rural spaces-hiking, playing by the beach, running into the ocean, and taking picnics. It seemed that Sundays, especially when other things might be closed, were a time to reconnect with nature and enjoy the simpler things in life with loved ones. I think implementing a ritual or a regular habit of connecting with plants or nature is something Coloradoans could get behind!
- Water Is A Resource-Protect It
Several times we saw advertisements on bus stops or buses that had the message: “Water is always worth saving. Help protect your precious resource.” Scots are very proud of their water, and even brag about how it tastes. It really does taste very clean and refreshing! Scots receive their drinking water from rainfall. There are towns that are experiencing a lack of water due to recent dry spells, and have had to have water trucked in. This sentiment of protecting water can be applied to Colorado. Coloradoans receive much of our drinking water from snowmelt. We are also dependent on precipitation for our water needs. In dry years, watering restrictions are put in place. While this year was relatively wet, there have been decades of dry years along the Front Range in our recent past. I think we all should be mindful and proud of our water, like the Scots! One way to protect our water is to be aware of how we impact our watershed- and those downstream of us. Here is a throwback blog on how to protect our watershed while gardening, click the link here.
Travel is part of a gardener’s education. But you do not have to go abroad to learn about how other gardeners approach plants or garden resources. The public library has a wealth of information on various gardening techniques that are from other cultures or other regions. I also think it is valid to check out other gardens in Colorado. Paonia and Berthoud both have independently claimed the title of “Garden Spot of Colorado.” Visit a high altitude garden in Aspen- Betty Ford Alpine Gardens. Or see a world-renowned crevice garden in Arvada -APEX Crevice Garden. When you travel, ask gardeners what they do in their garden. What works for them might be your new way of gardening too!

The Short & Sweet Fall Bulb Guide
Fall bulbs, also known as hardy bulbs, are always much anticipated in the garden center. Capable of surviving (and often requiring) cold, through the gloom of winter, hardy bulbs provide beautiful early spring flowers! Compared to tender bulbs like dahlias, gladiolus, and begonias, hardy bulbs are easier to work with and rarely need to be dug up for storage. However, like with all plants, they do benefit from a little help. In this article, we’ll talk about how to best care for fall bulbs!
Selecting A Site
Before choosing any bulbs, we recommend selecting a planting site first, as this is a major contributor to their survival. Bulbs given a poor growing site aren’t given the best situation to survive over winter. Soil quality, drainage, light availability, and soil richness should all be considered for bulb planting. The most important aspect for bulbs is aerated soil (CSU Extension). Dense soil will retain water and prevent root displacement, causing rot or bulbs to over-exert their energy. Aeration can be done by digging up the area and adding organic material to not only enrich the soil but also increase porosity, allowing water and air to flow freely. If your soil bears heavy clay, we recommend using EKO Clay Buster, Tree & Shrub Mix, or humus. Avoid animal manure, as this can burn bulbs unless evenly distributed after planting to act as fertilizer.
Light is essential for bulbs, but depending on placement, it can cause disruptions in dormancy. Avoid planting hardy bulbs close to a southern-exposed foundation, as the heat can wake bulbs early and cause death (CSU Extension). Likewise, hardy bulbs need general amounts of sunlight, about 8 hours per day. Avoid planting bulbs in total shade. You cannot count on the sun to insulate bulbs. After planting bulbs and especially after the first freeze, it’s recommended to apply mulch over the area to keep in extra heat (CSU Extension). Cedar mulch works best, but any fine mulch will do. Using shredded leaf mulch is also excellent as it will return nitrogen to the soil and feed the bulbs over winter. Avoid places where high wind tears through or where frost collects (UM Extension).
Colorado soil contains poor nutrients, so planting bulbs with bulb fertilizer is a wise idea. Pick a bulb-centered fertilizer, like Espoma Bulb-Tone, as it will provide the ideal amounts of Nitrogen, Phosphorus, Potassium, and additional minerals over winter and into spring. Oftentimes, it’s recommended to plant this fertilizer into the hole for the bulbs. Manure can be laid over the bulbs after planting to act as fertilizer, but only after the bulbs have been buried. Mulch will be laid on top, so think of it as an earthen lasagna in a way. Bulb, soil, manure, mulch. As snow soaks into the ground over winter, the manure’s nutrients are absorbed into the soil and, in turn, absorbed by the bulb.
Picking Bulbs
Hardy bulbs are designed to survive long winters. They contain nutrients to keep the plant alive for months and even require cold in order to break dormancy (University of Minnesota). There is thus a direct correlation between the size of a bulb and eventual flower size, as the larger the bulb, the better and bigger the flower due to stored nutrients (CSU Extension). Choose firm bulbs, as squishy textures or mold signify poor health. The best bulbs are chosen from open-air containers, not packets (CSU Extension). There are exceptions, as if packages have air holes to increase circulation.
Bulb Depth
Bulb species determine appropriate soil depth and spacing. Larger bulbs demand more space and depth. Tulips and daffodils, for example, are considered to be large hardy bulbs. They can be spaced 4 to 6 inches apart, while small bulbs can be spaced 1 to 3 inches apart (CSU Extension). A general rule for bulb planting depth is “four times the height of the bulb between soil surface and tip of the bulb” (CSU Extension). Bulb distributors often have fact sheets or planting guides attached to or on bulb packaging. If provided, it’s recommended to follow those instructions for each varying bulb species.
When you’re planting bulbs, make sure to place the bulb within its hole with the pointed end facing up towards the sky (University of Minnesota Extension). Not doing so will cause the bulb to grow in the wrong direction and eventually die. Planting should be done in September to allow ample root growth to form before fully going dormant, but October is sufficient(CSU Extension). The earlier they’re planted, the longer they have to establish. After planting, water the bulbs to allow them to settle and get a drink after their long travels from the farm to your garden (University of Minnesota Extension). Snow and rain are expected to water the garden throughout the year however Colorado often has dry winters. The occasional soak throughout the winter months will greatly benefit your bulbs (CSU Extension). If bulbs sprout prematurely, simply prune them back.
About Garlic
How does garlic differ from hardy bulbs? In all honesty, hardly at all! Garlic too is a hardy bulb, though obviously its not flowers you’re after, but the cloves. There are two “types” of garlic, hardneck and softneck garlic. Hardneck garlic is typically larger and more flavorful, sometimes even spicy! Hardneck garlic varieties include Meteichi and Rocambole. Hardnecks are also the hardiest of the hardy and thrive in our winter climate. Softneck garlic is the more commonly found garlic in supermarkets and has a milder flavor. They have a longer shelf life than hardneck varieties but aren’t too winter hardy, preferring mild winter weather. Softneck garlic includes Pueblo Early and Inchelium Red.
Applying more fertilizer to the garlic is really the only difference compared to fall flower bulbs, as the more food garlic is fed, the larger the cloves you’ll get! We recommend keeping the fertilizer organic, as synthetic fertilizer isn’t always the best to ingest—even if its absorbed through the plant. You might also want to plant garlic in mid-October rather than September so as not to prematurely wake it (Denver Urban Gardens).
Sources Used:
Colorado State Extension: CLICK HERE!
Denver Urban Gardens: CLICK HERE!
University of Minnesota: CLICK HERE!
Protecting Tomatoes Against Heat
Temperatures are rising, and plants are taking a beating, especially tomatoes. From blossom loss to poor growth, this South American fruit can’t always beat the heat. “Tomatoes grow best at uniformly moderate temperatures between 65 to 85 degrees Fahrenheit,” claims Colorado State University, “This is why a high altitude, semiarid climate like Colorado with wide daily temperature swings is not a favorable area for tomato growing (PlantTalk, 2025).” It’s important to identify heat stress compared to fungal issues. We’re going to go over some techniques for identifying heat stress and keeping tomatoes cool!
Heat Stress Signs
Are your blossoms falling off the tomato plant? Or has their growth suddenly halted? What about wilting? These are all signs of heat stress in tomatoes. Blossom loss is caused by high temperatures interfering with pollination. Dry winds don’t carry pollen well, so blossoms go unfertilized and die off. Halted growth is caused by cool night temperatures and scorching hot day temperatures, the contrast induces stress. And wilt is caused by numerous factors, not just heat. If the soil is dry, then it may be caused by accelerated evaporation due to heat. Fungal wilt disease is another issue caused by heat, due to the combination of a moist environment and then sudden heat. There are several varieties of fungal wilt, so we recommend checking out this article to fight them accordingly: Click here!
Fighting Heat
Time to beat the heat! Anything that retains moisture and shields plants from the sun will protect your tomatoes. We recommend a shade hail cloth, preferably one with a percentage like 30% light blockage. This filtered shade cloth will allow the tomatoes to get enough light while also creating a cool environment. Shade cloth shouldn’t be draped on the plant, it should be supported by PVC pipe or a tomato cage. Plus, it will also protect against hail when it hits!
Applying mulch will help retain moisture. Apply mulch in vegetable beds and containers. Make sure not to layer mulch right against the stem of the plant. Leaving space between mulch and plants helps prevent further fungal infections. Make sure the mulch isn’t dyed either. Dye isn’t safe for human consumption. Leaf mulch will also do the same thing! Leaf mulching involves shredding leaves that fall from trees to make your own mulch! It retains moisture like shredded wood mulch but also gives back precious nitrates, helping your tomatoes grow! To make leaf mulch you can buy a leaf mulcher or smash them with a weed whacker or mower. It’s obviously July, so leaves aren’t expected to fall until autumn but garden centers often have leaf mulch piles people drop off for others to take. We certainly do! Give us a call before driving home to make sure we have bagged.
Regardless if you choose to add mulch you may have to water more as the heat increases. We recommend following Colorado Springs Utilities for watering times. But when watering, water deep. Use a bubbler sprinkler or slow-release irrigation system and water in intervals. This is so the water penetrates the soil and soaks deeper, ensuring lower evaporation rates. This also helps strengthen roots and drought immunity in the plant!
Fighting heat isn’t easy, Colorado is a semi-arid high desert after all. Not all tomatoes will survive super hot summers, but these cool techniques will help preserve them! Plus, these techniques can be used on other plants too, from vegetables to annuals!
“Colorado State University.” PlantTalk Colorado. Accessed June 26, 2025. https://planttalk.colostate.edu/topics/vegetables/1835-tomato-questions-abound-heat/.
Planning For Trees
Gardening is for everyone, and that includes those who want a tree! How can this be? Not everyone has the space for these kinds of big plants. Not so fast-trees also include bonsai and indoor citrus too! Whether you want something decorative, fruiting, or just plain cool, we will help you pick and care for a tree that will thrive!
What To Look For: Location, Location, Location!
Trees are surprisingly delicate plants. Selecting the right plant, planting it at the optimal time, and choosing the ideal location is crucial for a tree to thrive. We’ll first go over site selection. Trees need space both above and below ground. Their canopies need to spread alongside their roots so they can establish themselves easily and live a long time. Keep in mind a tree’s full size before purchasing. If you’re lacking this space, a dwarf tree variety or even a shrub would be better.
Drainage also is important. Most soil in Colorado retains moisture poorly, however there can be areas with poor drainage in any environment. Picking a drought-tolerant tree would be best for soil that poorly retains moisture, the very best being a native tree. For a tree in a wet area pick one that enjoys damp soil, just don’t forget to water during the drier months!
Lastly, sunlight exposure is essential for trees (and generally all plants). Generally, trees need full sun but some don’t like bright hot light and prefer partial shade. Most trees we carry in our nursery will have little information packets attached to their branches about light requirements. If they don’t, our Ricksters are always happy to help!
What To Look For: Healthy Trees Please!
Now we get to the fun part: picking out the tree! Picking a healthy tree will benefit your wallet and the health of your garden or yard. An unhealthy or sickly tree can transmit disease and decay to other plants, so knowing what to look for while shopping is essential for everyone! Tree leaves shouldn’t be wilting, have discolored bark, odd spots, or oddly colored leaves. You shouldn’t buy a tree that has non-beneficial insects, like aphids or mealy bugs, on its leaves, branches, or bark. Trees should have evenly spaced branches and a central branch that acts as the main trunk. The Colorado State Forest Service suggests, “Tree foliage and branches should be distributed on the upper 2/3 of the tree.” Study the tree roots too. Are roots circling, appear pot bound or are suffocating the stem and trunk of the tree? These are all bad signs and this tree shouldn’t be purchased.
Why Natives?
Some trees will do better in Colorado than others. Native trees in particular are hardier and built for our drastic climate. Generally, they will also need less maintenance, like less watering, pruning, and insect control. Natives will thrive in Colorado hardiness zones, though there are always exceptions. A great place to check out native trees and shrubs is at Colorado State University Extension. Alongside pictures, each tab is filled with information about the plant’s preferred elevation, habitat, and more. Click the link to learn more: https://csfs.colostate.edu/colorado-trees/colorados-major-tree-species/
Planting
Trees have specificities when it comes to planting. When you choose to purchase a tree from our nursery, we’ll typically send you home with one of our tree-planting guides. It’s also available on our website, link located here for ease: https://www.ricksgarden.com/wp-content/uploads/2021/04/Ricks-Tree-Shrub-Planting-Guide.pdf .
We want to remind you to NOT FERTILIZE your tree for the first year! This can damage and even kill a tree. Trees are getting established in their new home and this is a stressful time. Applying fertilizer adds unnecessary stress in the first year.
Whether you choose a flowering crab apple or go the native route and pick a tree that easily establishes in our area, finding the right fit tree is what we should all strive for. A chosen tree should be picked to thrive in your yard’s microclimate. Once established, trees return the favor. Providing shade, habitats for animals and birds, cleaning the air and water, and limiting rain runoff are just a few of the reasons a tree can benefit the community. Likewise, trees increase property value and cut noise pollution! Trees are legacy gifts to the environment and to future generations. Whatever your reason is for choosing a tree we’re happy to help you do it right. Happy gardening!
Preventing Water Loss
We understand it’s not easy to garden this year-especially with how expensive watering can be. Trust us, it’s no easy feat to maintain watering our plants either. But we don’t think you should have to give up gardening entirely. Knowing and understanding water loss will help prevent it, saving you money and protecting the environment! Gardening is for everyone and water costs shouldn’t stop you.
Reduce Evaporation
Colorado is notoriously dry. Combined with a hot summer, it creates treacherous environments for gardens. “Thanks to capillary action throughout the soil, which draws water up from below,” says Rhonda Massingham Hart, author of “The Dirt Cheap Green Thumb,” “evaporation can deplete water from deep in the ground.” If you don’t want water to leave your soil, mulch over the top. Gorilla hair maintains water the best and as a perk clumps, so it won’t blow away either. Another good mulch is straw! And if you lay gravel on top, which is also an excellent mulch, it will keep the straw down for you. Gravel mulch however retains heat. In the dog days of summer, this can lead to trouble. If you’re interested in free mulch and willing to work up a sweat, check out the cities free mulch pile: Click here!
Likewise, consider putting down a drip system or soaker-style sprinkler head. Sprinklers that disperse through the air lose more water than these close-contact irrigation systems. If you don’t have the funds for an irrigation system consider purchasing or making olla pots! This technique hails from ancient Northern Africa & China and involves an unglazed terra cotta pot used for underground irrigation. Due to the porous nature of the unglazed terra cotta, the water leaches slowly into the soil. And because the olla put is partially buried or almost totally buried underground, water is less likely to evaporate. To make your own gather terra cotta pots (they cannot be glazed), plug the drainage holes, and place a lid over the top of it. To learn how to make your own olla pot, watch this short video: Click here!
You can also use plastic containers, like old milk jugs, to create olla pots. Wash out milk containers then puncture three holes on the bottom with a hammer and nail, knife, or other cutting tool. These holes shouldn’t be large. Bury the container up to the neck and remove the cap. Fill with water, screw the cap back on, and viola! Plastic olla pot! Keep an eye on when to refill your olla pot and tailor the size of the container to the plant. This too goes for terra cotta olla pots.
Amendments & Native Plants
You can add amendments to your soil to retain and even attract water. Ever heard of humus? Humus is essentially composted plant and animal matter, yet it’s different from typical compost. Our brand of humus we sell is made only with plant product and is one of thew few vegan style compost we provide. Dark in color and rich in nutrients, humus is also excellent at conserving water. Its presence within your soil lessens water percolation and keeps it “in reach” for plants. Likewise, it also slowly releases nitrogen, sulfur, and other essential amendments to plants over time. If you’d like to learn more about humus, read this article and scroll to pages 212-3: Click here!
On hot summer days, plants sweat like us. “One large shade tree can transpire several hundred gallons of water through its leaves,” remarks Rhonda Massignham Hart. While this tidbit of information seems contrary to the information above about reducing water evaporation, misting plants on especially hot days will likewise retain water. This shouldn’t be done every day however, reserve misting for only the hottest and driest of summer days. Native plants are less likely to transpire as non-native because they are adapted to Colorado’s semi-arid climate. If you’re tight on cash for water yet are looking to plant something new, always always ALWAYS choose native. Not only will these plants be saving you money but also you’ll also be helping the environment by returning native plants to the ecosystem! Don’t be surprised if your plants attract more beneficial bugs, birds, and even larger wildlife. Here at Rick’s we’re especially focused on trying to increase our native perennial selection for this reason. If you want certain qualities of native plants, here is a great way to select what you want before shopping at Ricks: Click here!
Conserving water doesn’t have to be scary or expensive. With these hacks, you’re sure to save on your water bill. Here at Rick’s, we’re excited to share more gardening tricks and tips. No one should ever have to give up gardening due to money or to the environment. Gardening is for everyone!
Encouraging Kid’s Green Thumbs
There is a saying that “green thumbs are not born, they’re grown.” And here at Rick’s we heartily agree! Green thumbs come in all shapes and sizes, and even ages. Today we want to encourage younger green thumbs- kiddos! Kids are naturally attracted to dirt, worms, flowers, bugs, watering cans, seeds, berries and even veggies that are unique. It really is quite easy to get them hooked on becoming gardeners. Some may balk at including kiddos in the garden. What if they mess things up? I counter, adults also mess things up in the garden- often without trying. Let the kids learn, experiment, play and succeed in the garden. If you are a parent, teacher, guardian, devoted auntie, grandparent, or other care giver, these tips will get you started on introducing kids to the wide world of science and beauty of plants.
Gardening is an adventure into math, science and art. Math is used when discussing how far and deep seeds are planted, as well as in the conversation of, “If we have three eaters in our home, how many zucchini plants do we need to plant?” There is no right answer for this conundrum, because you typically end up with too many zucchini in general. But having that conversation with a child allows them to think of the production of one zucchini plant, how to extrapolate how many ways they and other eaters can eat zucchini, and to problem solve with what to do with any extras. Maybe the neighbor next door would like some?
Science takes a look at the immediate needs of a plant; nutrients, water and sunlight. But as a kiddo becomes more advanced in their gardening skills, you can begin talking about seed production, pollination, photosynthesis, soil biology, mushrooms, diseases, pests and the list goes on! Perhaps most importantly, it may be wise to share why gardening is so important to embark on in this time and age. This can cover creating habitats and safe zones for pollinators, building food sovereignty and security while avoiding supply chain disturbances, farming for the purpose of carbon sequestration, etc. And the variations on this theme grow infinitely from there.
Of course art goes hand in hand with gardening. Design and edibleness are dependent on aesthetic values. A child will love choosing pansies (some look like tiger stripes!), colorful zinnias, snapdragons, and other annual flowers for their container garden. Consider taking them through the perennials section for in season cut bouquets, including daisies, black-eyed Susans, Penstemons, and Yarrow. They may want to try purple carrots, purple tomatillos, purple beans or peas, or eggplants if the kiddo’s favorite color is, you guessed it- purple! Challenge them to create colorful dishes with the veggies you all grow. “Can you create an all orange meal? All green? Red? Can you have every color of the rainbow represented on your plate?” Growing vegetables for their colors is not only fun, it is healthy! Produce that have unique colors often are chock full of vitamins, antioxidants and other nutrients that we may neglect to get through our Standard American Diet (SAD).
Other ways to encourage the gardener in every child:
- Pick out seeds together to grow by inviting them to take a look at a seed catalog or a seed company’s website. If you are looking for wild and very colorful seeds, Baker Creek Seeds is a great start!
- Grow sprouts or microgreens if you are lacking space, but want a child to see the life of a plant from seed to germination to the plate. See our other blog this month for details on how to grow microgreens!
- Grow things that create awe and wonder like:
- Sunflowers
- Beans
- Pumpkins
- Small cherry tomato varieties (Spoon is a great variety, because it is abundant and kiddos love the “baby” tomatoes)
- Raspberries and blackberries
- Plant a tree, and talk through how trees are important for creating habitat, providing oxygen, cooling of the climate and are a generous resource for paper, fruit, and wood.
- Plant fall or spring bulbs for children who may need an example of delayed gratification. Plant the popular daffodils in the fall and watch them bloom in the spring. Or plant gladiolas now and watch them pop up late summer.
- Build an observation habitat: Plant flowers and other plants that will attract hummingbirds or other pollinators that the children love (butterflies, bumble bees, etc). Place a bench beside the habitat and have children tell you what they see, hear, smell, feel, etc. This prompts quiet patience and the building blocks for scientific inquiry.
- Begin a worm or compost bin. Collect kitchen scraps, shred old school work, or bills and throw in a generous community of worms. Children will be amazed to watch these items turn into worm castings, or worm poo, and how it can be used in the garden or with house plants.
A kiddo who eats their first carrot or snap pea from the garden will never forget that moment. While gardening is magical as a child, being an adult and witnessing the magic is priceless. Green thumbs can grow at any age and stage, but it is a true gift to give the love for gardening to a child. They have the rest of their lives to grow with it!
Rick’s Garden Center believes in the power of people and plants. All of our blogs and content are written and edited by real humans with their own unique creative perspectives. Any use of our publications to ‘train’ generative artificial intelligence (AI) technologies to generative text is expressly prohibited. Any typos or errors are our own
2025 Garden To-Do’s Recap 1#
Here are the gardening references we shared over the past month. We’re big fans of Colorado State University extension, so you’ll see us referencing them all the time. However, we also have some written articles just for you under our blog! There will be more gardening references for the year, so stay tuned!
Relative Houseplant Care/Rescuing House Plants:
Listen…shhhhh…if you listen closely, you can hear that neglected plant in the corner crying for help. You did not mean to cause harm. Whether you left for your holiday travels in a rush and failed to give your plants some extra TLC before you left, or you do not know the plant’s needs, the stress is equally killing you. You are at the point of not knowing what to do to make your plants happy again. No worries! We got you on our blog!
Starting Seeds Indoors:
We know it seems early, but the sooner you start your seeds the better. For tomato and pepper plants it’s recommended you start them outside once soil temperatures reach 50 degrees at night. This however doesn’t work well for Colorado’s short growing season. To get the most produce out of your vegetables we recommend starting seeds indoors now and in February! All you need is a seed-starting soil mix and a grow kit!
Seed Starting Troubles:
Have you been waiting for your seeds to pop up and still nothing? No matter what you do, your seedlings perish. There are multiple factors as to why your seeds may not be sprouting. Seed age, crusting soil, and temperature fluctuation are just a few. In the article below by CSU Extension, scientists review why your seeds may not thrive as they should. Fear not, solutions are provided to fix issues and to get those seeds growing! Happy gardening!
Winter Watering:
If air temperature is above 40 degrees it’s time to winter water! Read more about winter watering rules below!
https://www.csu.org/blog/winter-watering-tips
Do’s & Dont’s of Transplanting:
Want to get bang for your buck when starting transplants? Learn the dos and don’ts of growing transplants by copying and pasting the link below! And if you need containers we wanted to remind you we have a free drop off/pick up bin behind the store in our parking lot-perfect for starting seeds or other transplants (once they’re clean that is)!
Garden Planning:
Now’s a great time to start garden planning for spring! Remember to consider space when mapping your beds and companion plants! The links below will lead to more information about early garden planning and companion plants!
General Info:
Companion Plants:
General Onion Care:
Intimidated by growing and planting onions? How about storage, before and after planting and growing these flavorful bulbs? And what the heck does daylight have to do with all of it?
Among the hundreds of questions involving onions you may have, we’ve contacted the experts for their advice. Learn the essentials for onion care from Dixondale Farms!
Growing Potatoes at Home:
Want to try growing potatoes this season in your home garden? We have a link for you! We recommend reading Colorado State University article on the subject!
https://extension.colostate.edu/topic-areas/yard-garden/potatoes-in-the-home-garden-7-617
Spring Bulb Care:
Intimidated by growing spring bulbs? Don’t be with Colorado State Extensions help! Learn how to keep beautiful spring bulbs, corms, and roots alive by reading the article below or in our story/highlights. The article provides everything from choosing a perfect planting spot to planting depth for certain favorites Happy gardening!
https://extension.colostate.edu/topic-areas/yard-garden/spring-planted-bulbs-corms-and-roots-7-411
Rick’s Tree Planting Guide:
We know many of you are familiar with our Tree Planting Guide, so here it is again! This guide is perfect for those interested in buying a tree or about to plant a new one. We also sell mulch, root stimulators, and mycorrhizae for tree planting! Happy gardening!
https://www.ricksgarden.com/wp-content/uploads/2021/04/Ricks-Tree-Shrub-Planting-Guide.pdf
