Colorado Seed Starting 101: Advice From Rick’s Grow Team
If you want lots of fruits and veggies come summer, the best gardening advice we can offer you is to start early and indoors. Colorado’s growing season is too short for many garden favorites. Eggplants, peppers and tomatoes do not have enough time exclusively outdoors to produce a bountiful harvest. That being said, we’d like to share some of our own techniques for extending the season. Starting seeds inside is the best way to get this jumpstart on the season. And I can thank our spectacular Grow Team, particularly Emma & Jenn, for the helpful advice! If you are a seasoned gardener, or this is your first season growing a garden, enjoy some of our best tips for being successful at seed starting.
Days To Maturity & Pre-Planting
As previously mentioned, Colorado’s growing season is short. When I visited Missouri one time, I was amazed that communities had tomatoes ready to harvest by June, and all of them were grown outside, from seed! Colorado gardeners can have full bushels of tomatoes come June also; we just have to start early and indoors. The best way to plan for this is to research days to maturity for each plant and start according to these specifications. Depending on when the plants reach maturity, you should sow seeds indoors an additional 4 to 6 weeks before the last frost date. For example, peppers need about 85 days to reach maturity. With a bit of math, 85 days turns into 12 weeks. Maturity refers to the number of days it takes the plant to produce fruit. Add four to six weeks on top of that for germination, then research your area’s last frost date through a trusted weather channel. Colorado Springs is typically on May 8th or even Mothers Day. Just to be safe, we’ll use Mother’s Day as a guide for our planning going forward. Subtracting roughly 14 weeks from May 10th means the optimal planting date is January 18th. A little late, but that doesn’t mean you can’t plant peppers; they’ll just fruit a little later! You can find maturity information on the back of seed packets. We’ll also provide a link below this paragraph to one of our favorite references, Colorado State Extension, and their incredible Colorado Vegetable Guide. Click here to read!
Drainage, Drainage, Drainage!
A major seed killer is overwatering, which is easy to do. However, raw seeds need to remain moist until cracking appears, which creates a conundrum in terms of watering. Both Jenn and Emma recommend a combination of fine-draining growing medium and special watering techniques to avoid this. In terms of growing medium, our Grow Team actually starts seeds in vermiculite. It has to be coarse for the best aeration, but if you water less, fine-grade is alright. Seedlings will stay in vermiculite for two weeks, then will be transplanted into a special seed soil or Foxfarm’s Happy Frog soil. Why do we not keep seeds in vermiculite permanently until they can go into larger pots? Vermiculite isn’t great at storing nutrients for seedlings, which obviously isn’t a benefit if you want to grow delicious, healthy, and strong vegetable plants (or any plant). And in terms of watering, we use misters, not watering cans or a hose. Keep the medium moist but not soggy. It’s the Goldilock’s ideal for the seeds!
Warm Bottoms, Cool Tops
A trick to creating a perfect environment for seeds, Emma told me, is to keep the following phrase in mind: warm bottom, cool tops. She and her grow team raise a majority of our vegetable starts in one of our many greenhouses, including a major crop of our tomato varieties. In the greenhouse, we have enough space to use heating mats, and regulate temperature with a greenhouse heater. We also understand many readers aren’t as lucky when it comes to such growing conditions. If you live in an apartment, a small home, or are on a budget, where do you even start, much less keep in mind the mantra “warm bottoms, cool tops?” Let’s translate the quote and make alterations. Seeds should have a warm and inviting substrate to thrive in, preferably one heated by a heating mat. Hence, the “warm bottoms” of the first half of the mantra. Whether growing in a greenhouse or at home, we always recommend a heating mat. It emulates summer growing temperatures that vegetables, like peppers, need. We carry various heat mats, some with timers and others without, that would work perfectly for a smaller grow setting. These mats should be set between 80 to 70 degrees Fahrenheit.
What about the meaning of “cool top?” In our greenhouse, there’s the heater, but even now, the environment is still considered “cool” compared to summer temperatures. The contrast between soil and air tells the seed which direction to grow, establish roots in the warm earth, whilst the stalk should reach to the cool air above ground. The air cannot be too frigid, however (hence the greenhouse heater), or else the sprout will have stunted growth or die. In a home operation, we recommend growing seeds in a warm spot with full sun, using a plastic greenhouse cover only when the sun moves away to keep in the heat. The space you plan to grow seeds in, shouldn’t go below 68 degrees Fahrenheit.
Light On The Subject
This is essential for growing seeds at home, Jenn mentions, “as much light as possible is essential for starting seeds.” And we’re not talking about keeping seeds by windows. We’re talking grow lights, which sounds like overkill to many, but if you want to avoid leggy plants they’re a must. Have you ever grown seeds at home and noticed that as they mature, they become long, stringy, and weak? This is what we mean by leggy. These plants are desperate for light, but without enough, they cease to function since photosynthesis depends on sunlight. Jenn recommends keeping the grow light as close as possible, and eventually “upgrading” seed domes (which is where the grow light can rest upon). This is the best way to avoid leggy seedlings.
Quick but helpful tips (we hope) to Colorado seed starting! We know gardening can be expensive, and some of these supplies will be, but in the end, nothing beats the pride of using your own plant starts for the summer. Plus, your wallet will thank you in the long run, too! Happy gardening!
The Importance of Winter Watering
The Importance of Winter Watering
While your favorite ski resort may be open for business, snowfall in the mountains as well as the front range is down this year. Reports show that snowpack levels across the state are 47% of normal levels. The southern Colorado region has below-average snowpack for this point in the season. While snowfall has been variable and not consistent even as far back as the 1800’s, there are some trends that we need to consider as gardeners. While not very strong, there is a correlation that has become apparent for lower elevation areas in the state (and could be an indicator for us in future years). If the first snowfall is not until November or later, this correlates to a lesser snowfall total for the area as a whole. This concern aligns with recorded temperatures, indicating that our region is experiencing warmer and drier autumns. This is significant for our landscape plants: trees, shrubs, and perennials. To break it down further, without any supplemental water, our outdoor plants are going longer without moisture after the main growing season and receiving potentially less water even when they do finally get snow. Additional food for thought includes that every foot of snow is roughly one inch of rain.
This corresponds to what we hear and see from our customers who come in the spring to replace plants that have experienced “winter kill.” While the term winter kill is traditionally used to describe icy or extremely cold temperatures that cause plant death, customers are using this term to describe plant death in general over the winter season. The type of death these plants are experiencing is completely preventable. They are dying of dehydration. Dry soils do not insulate roots, and thus plants are more susceptible to freeze damage and the swings of freezing/ thawing that we experience in this region.
When we have mild months, like this past November or December, we need to be winter watering. Winter watering requires you to manually water after irrigation or sprinklers are turned off prior to a freeze. Manually watering sounds labor-intensive in our world of automation, but it is rather simple. Remember, dear reader, gardening is one of the last bastions of manual labor. Enjoy the little labor it takes to have beautiful plants! There is a reason the phrase, “labor of love,” exists after all. I digress. Take a garden hose, if you are up for connecting and disconnecting a hose to a spigot, and let the hose trickle at the base of your plant(s) for a little bit. If you have a mature tree, let it trickle for about an hour or two. Less for smaller or less mature plants. If you don’t want to deal with a hose, take a bucket of water and pour it at the base of the plant for a drink. If you want to water your tree properly, you are shooting for ten gallons of water per inch of the tree trunk’s diameter. Which may be even more work than just pulling out your garden hose, that may or may not be mangled under your lawn mower. Pouring buckets of water repeatedly in the same spot may also cause some erosion, so I prefer the slow trickle method. Do this at least once a month on warm days (above 40- 50 degrees Farenheit).
Some individuals look for quick fixes, so they do not have to manually water. I caution against these methods, even if we carry the implements at Rick’s. Tree donuts, water gators, or water bags that have been designed to slowly water trees should only be used during the growing season, and outside of freezing temperatures. If the tree donut freezes at the crown of the tree, this can also cause death. This invention does not mimic snow. Snow slowly melts without creating a solid barrier. A frozen tree donut of ice prevents the tree’s surface roots from “breathing” or completing their nutrient exchange and absorption. Do not look for a shortcut on winter watering.
While many people believe that plants go to sleep during the winter and therefore do not need any care, this is not the case. This would be like a human being in a coma, but never being given an IV. An IV is to ensure that they are receiving liquids and nutrients until they wake back up! Apply this metaphor to your landscape plants. When we do not have the winter moisture and fail to winterwater our landscape plants, they die a perfectly preventable death. Enjoy the sunshine that is common in a Colorado winter, and pull out that garden hose to give your tree a drink!
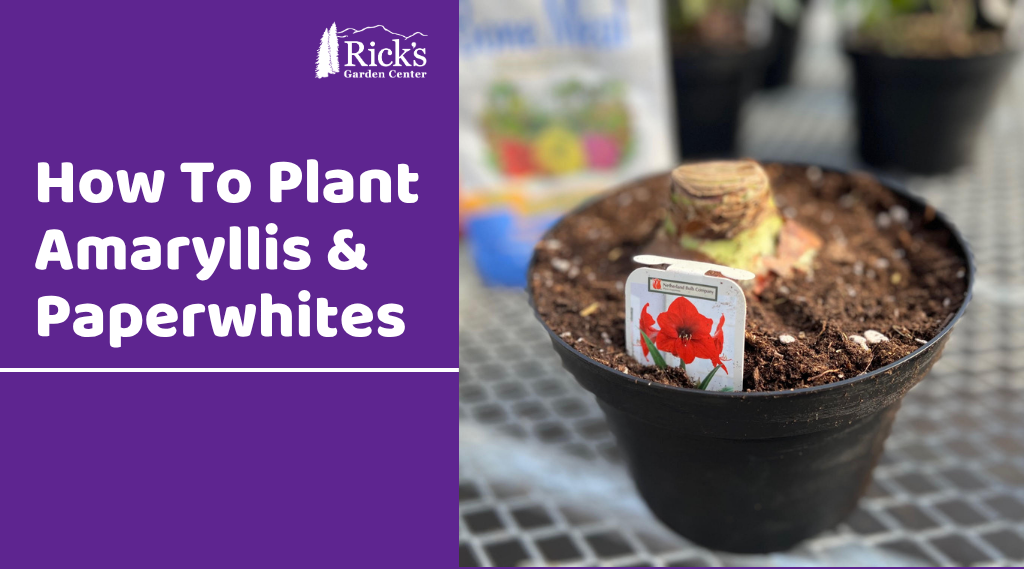
How To Plant Amaryllis & Paperwhites
Our holiday bulbs are here! Make way for Amaryllis & Paperwhites! Because these plants need to be planted about eight to ten weeks in advance, to flower around Christmas, we thought we’d provide this care guide now. Caring for and planting these bulbs is surprisingly easy!
How To Plant Holiday Bulbs
Ingredients:
-Bulbs, one Amaryllis or ten to eight Paperwhites.
-Well-draining soil (we’re using Fertilome Ultimate Potting Soil).
-8 Inch Container.
-Bulb fertilizer (we’re using both blood meal and bone meal).
Step-By-Step Guide
1.) Let’s start with the substrate. To prevent rot, pick soil with excellent drainage for these bulbs. We prefer Fertilome Ultimate Potting Soil, but Fox Farm’s Happy Frog works too. Gardners occasionally plant Amaryllis in a succulent mix, replicating their natural arid environment. Be cautious with this approach because it requires more watering due to extremely well draining soil.
2.) Once your soil is selected, fill about two-thirds of the container of your choice. Here, for both paperwhites and amaryllis, we’re using an 8 inch nursery injection pot. But you can use any kind of container. Having a hole for drainage is essential, and bulbs need some wiggle room.
3.) We advise fertilizing bulbs with a slow-release organic fertilizer. Whilst bulb-specific fertilizer, like Espoma Bulb-Tone, is ideal due to phosphorus levels, a flower fertilizer likewise works. Here, we choose to use blood meal and bone meal, high sources of nitrogen and phosphorus. We’ll eyeball the amounts because with them organic and a slow-release fertilizer burn isn’t a high concern.
4.) Plant your bulbs! Make sure roots are pointing down to the bottom of the pot, tip pointing to the sky. In fact, about one-third of the top of the plant should be above the soil. Amaryllis should have an inch and a half of space around the bulb and enough depth to properly root out. Paperwhites can be planted close together, but bulbs shouldn’t be touching. Think of how an egg carton is arranged! They should also have good depth for their roots to grow.
5.) Now, give the bulbs a light water. This helps pack them in. Rot is the primary cause of death for bulbs, so maintaining a good watering schedule is essential for their survival. We recommend watering every other day in a dry environment, less so in a humid environment. Lower watering to once every four days once green sprouts appear.
The Short & Sweet Fall Bulb Guide
Fall bulbs, also known as hardy bulbs, are always much anticipated in the garden center. Capable of surviving (and often requiring) cold, through the gloom of winter, hardy bulbs provide beautiful early spring flowers! Compared to tender bulbs like dahlias, gladiolus, and begonias, hardy bulbs are easier to work with and rarely need to be dug up for storage. However, like with all plants, they do benefit from a little help. In this article, we’ll talk about how to best care for fall bulbs!
Selecting A Site
Before choosing any bulbs, we recommend selecting a planting site first, as this is a major contributor to their survival. Bulbs given a poor growing site aren’t given the best situation to survive over winter. Soil quality, drainage, light availability, and soil richness should all be considered for bulb planting. The most important aspect for bulbs is aerated soil (CSU Extension). Dense soil will retain water and prevent root displacement, causing rot or bulbs to over-exert their energy. Aeration can be done by digging up the area and adding organic material to not only enrich the soil but also increase porosity, allowing water and air to flow freely. If your soil bears heavy clay, we recommend using EKO Clay Buster, Tree & Shrub Mix, or humus. Avoid animal manure, as this can burn bulbs unless evenly distributed after planting to act as fertilizer.
Light is essential for bulbs, but depending on placement, it can cause disruptions in dormancy. Avoid planting hardy bulbs close to a southern-exposed foundation, as the heat can wake bulbs early and cause death (CSU Extension). Likewise, hardy bulbs need general amounts of sunlight, about 8 hours per day. Avoid planting bulbs in total shade. You cannot count on the sun to insulate bulbs. After planting bulbs and especially after the first freeze, it’s recommended to apply mulch over the area to keep in extra heat (CSU Extension). Cedar mulch works best, but any fine mulch will do. Using shredded leaf mulch is also excellent as it will return nitrogen to the soil and feed the bulbs over winter. Avoid places where high wind tears through or where frost collects (UM Extension).
Colorado soil contains poor nutrients, so planting bulbs with bulb fertilizer is a wise idea. Pick a bulb-centered fertilizer, like Espoma Bulb-Tone, as it will provide the ideal amounts of Nitrogen, Phosphorus, Potassium, and additional minerals over winter and into spring. Oftentimes, it’s recommended to plant this fertilizer into the hole for the bulbs. Manure can be laid over the bulbs after planting to act as fertilizer, but only after the bulbs have been buried. Mulch will be laid on top, so think of it as an earthen lasagna in a way. Bulb, soil, manure, mulch. As snow soaks into the ground over winter, the manure’s nutrients are absorbed into the soil and, in turn, absorbed by the bulb.
Picking Bulbs
Hardy bulbs are designed to survive long winters. They contain nutrients to keep the plant alive for months and even require cold in order to break dormancy (University of Minnesota). There is thus a direct correlation between the size of a bulb and eventual flower size, as the larger the bulb, the better and bigger the flower due to stored nutrients (CSU Extension). Choose firm bulbs, as squishy textures or mold signify poor health. The best bulbs are chosen from open-air containers, not packets (CSU Extension). There are exceptions, as if packages have air holes to increase circulation.
Bulb Depth
Bulb species determine appropriate soil depth and spacing. Larger bulbs demand more space and depth. Tulips and daffodils, for example, are considered to be large hardy bulbs. They can be spaced 4 to 6 inches apart, while small bulbs can be spaced 1 to 3 inches apart (CSU Extension). A general rule for bulb planting depth is “four times the height of the bulb between soil surface and tip of the bulb” (CSU Extension). Bulb distributors often have fact sheets or planting guides attached to or on bulb packaging. If provided, it’s recommended to follow those instructions for each varying bulb species.
When you’re planting bulbs, make sure to place the bulb within its hole with the pointed end facing up towards the sky (University of Minnesota Extension). Not doing so will cause the bulb to grow in the wrong direction and eventually die. Planting should be done in September to allow ample root growth to form before fully going dormant, but October is sufficient(CSU Extension). The earlier they’re planted, the longer they have to establish. After planting, water the bulbs to allow them to settle and get a drink after their long travels from the farm to your garden (University of Minnesota Extension). Snow and rain are expected to water the garden throughout the year however Colorado often has dry winters. The occasional soak throughout the winter months will greatly benefit your bulbs (CSU Extension). If bulbs sprout prematurely, simply prune them back.
About Garlic
How does garlic differ from hardy bulbs? In all honesty, hardly at all! Garlic too is a hardy bulb, though obviously its not flowers you’re after, but the cloves. There are two “types” of garlic, hardneck and softneck garlic. Hardneck garlic is typically larger and more flavorful, sometimes even spicy! Hardneck garlic varieties include Meteichi and Rocambole. Hardnecks are also the hardiest of the hardy and thrive in our winter climate. Softneck garlic is the more commonly found garlic in supermarkets and has a milder flavor. They have a longer shelf life than hardneck varieties but aren’t too winter hardy, preferring mild winter weather. Softneck garlic includes Pueblo Early and Inchelium Red.
Applying more fertilizer to the garlic is really the only difference compared to fall flower bulbs, as the more food garlic is fed, the larger the cloves you’ll get! We recommend keeping the fertilizer organic, as synthetic fertilizer isn’t always the best to ingest—even if its absorbed through the plant. You might also want to plant garlic in mid-October rather than September so as not to prematurely wake it (Denver Urban Gardens).
Sources Used:
Colorado State Extension: CLICK HERE!
Denver Urban Gardens: CLICK HERE!
University of Minnesota: CLICK HERE!
2025 Garden To-Do’s Recap 1#
Here are the gardening references we shared over the past month. We’re big fans of Colorado State University extension, so you’ll see us referencing them all the time. However, we also have some written articles just for you under our blog! There will be more gardening references for the year, so stay tuned!
Relative Houseplant Care/Rescuing House Plants:
Listen…shhhhh…if you listen closely, you can hear that neglected plant in the corner crying for help. You did not mean to cause harm. Whether you left for your holiday travels in a rush and failed to give your plants some extra TLC before you left, or you do not know the plant’s needs, the stress is equally killing you. You are at the point of not knowing what to do to make your plants happy again. No worries! We got you on our blog!
Starting Seeds Indoors:
We know it seems early, but the sooner you start your seeds the better. For tomato and pepper plants it’s recommended you start them outside once soil temperatures reach 50 degrees at night. This however doesn’t work well for Colorado’s short growing season. To get the most produce out of your vegetables we recommend starting seeds indoors now and in February! All you need is a seed-starting soil mix and a grow kit!
Seed Starting Troubles:
Have you been waiting for your seeds to pop up and still nothing? No matter what you do, your seedlings perish. There are multiple factors as to why your seeds may not be sprouting. Seed age, crusting soil, and temperature fluctuation are just a few. In the article below by CSU Extension, scientists review why your seeds may not thrive as they should. Fear not, solutions are provided to fix issues and to get those seeds growing! Happy gardening!
Winter Watering:
If air temperature is above 40 degrees it’s time to winter water! Read more about winter watering rules below!
https://www.csu.org/blog/winter-watering-tips
Do’s & Dont’s of Transplanting:
Want to get bang for your buck when starting transplants? Learn the dos and don’ts of growing transplants by copying and pasting the link below! And if you need containers we wanted to remind you we have a free drop off/pick up bin behind the store in our parking lot-perfect for starting seeds or other transplants (once they’re clean that is)!
Garden Planning:
Now’s a great time to start garden planning for spring! Remember to consider space when mapping your beds and companion plants! The links below will lead to more information about early garden planning and companion plants!
General Info:
Companion Plants:
General Onion Care:
Intimidated by growing and planting onions? How about storage, before and after planting and growing these flavorful bulbs? And what the heck does daylight have to do with all of it?
Among the hundreds of questions involving onions you may have, we’ve contacted the experts for their advice. Learn the essentials for onion care from Dixondale Farms!
Growing Potatoes at Home:
Want to try growing potatoes this season in your home garden? We have a link for you! We recommend reading Colorado State University article on the subject!
https://extension.colostate.edu/topic-areas/yard-garden/potatoes-in-the-home-garden-7-617
Spring Bulb Care:
Intimidated by growing spring bulbs? Don’t be with Colorado State Extensions help! Learn how to keep beautiful spring bulbs, corms, and roots alive by reading the article below or in our story/highlights. The article provides everything from choosing a perfect planting spot to planting depth for certain favorites Happy gardening!
https://extension.colostate.edu/topic-areas/yard-garden/spring-planted-bulbs-corms-and-roots-7-411
Rick’s Tree Planting Guide:
We know many of you are familiar with our Tree Planting Guide, so here it is again! This guide is perfect for those interested in buying a tree or about to plant a new one. We also sell mulch, root stimulators, and mycorrhizae for tree planting! Happy gardening!
https://www.ricksgarden.com/wp-content/uploads/2021/04/Ricks-Tree-Shrub-Planting-Guide.pdf

January 2025 Recap
Monday: Rick’s Highlights
On Mondays, we like to post about things happening around the store! There will be LOTS MORE in February!

Astrophytum asterias Superkabuto
- Originate in Northern & Central Mexico!
- Sought out due to their beautiful white spotted patterns and semi-fuzzy texture.
- Occasionally even flowers! Flower color is white.
- Maximum size is about equal to a baseball!
Sinningia Hybrid
- Comes from Brazil!
- A perennial hybird of two different Sinningia, equates to a hardier plant!
- Similar to African Violets in terms of light needs.
- Misting soil required if plant goes dormant.
Raphionacme flanaganii
- Native range its from Kenya to E. South Africa.
- Produces vines that reach to 3′ long.
- Enjoys partial sun and shade.
- Occasionally blooms small fragrant flowers that green with a burgundy center.
Calibanus hookeri
- Native to North Central Mexico.
- One of only two species in genus, making this plant VERY RARE!
- Related to Ponytail Palms, somewhat pet safe.
ALL OF THESE PLANTS ARE CURRENTLY FOR SALE! We have a limited quantity, so hurry in before they’re gone!
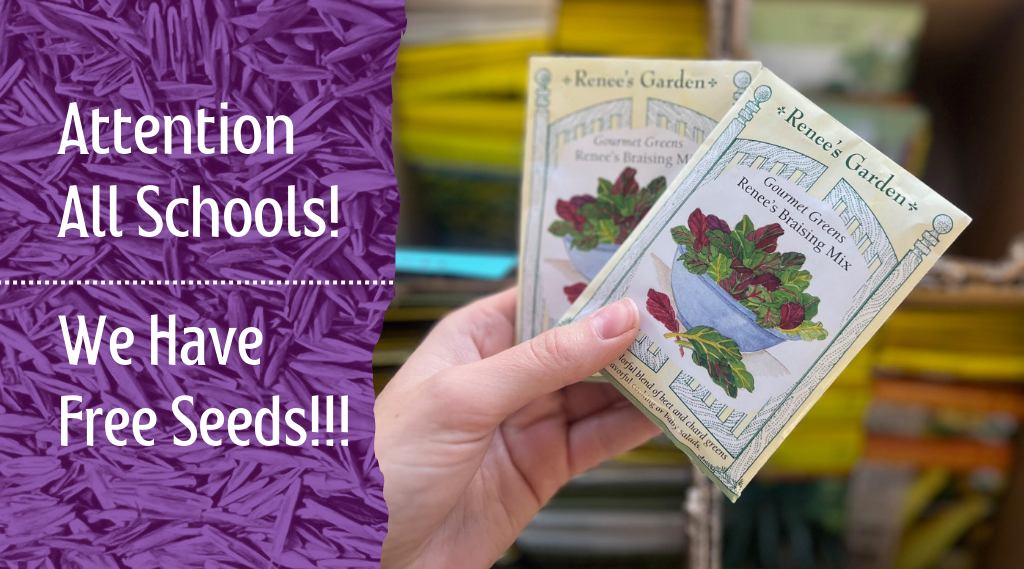
A select group of seeds are 2024 stock, so sales-wise they’re considered “expired.” However, that doesn’t mean they won’t sprout! We like to give our “expired” seeds away for free to places that need them, such as schools and other community centers. If you’re school is interested in seeds, please come into the store and show your school ID or community center ID at the front desk! Happy gardening!
We have both flower & vegetable 2024 seeds!
Tuesday: None
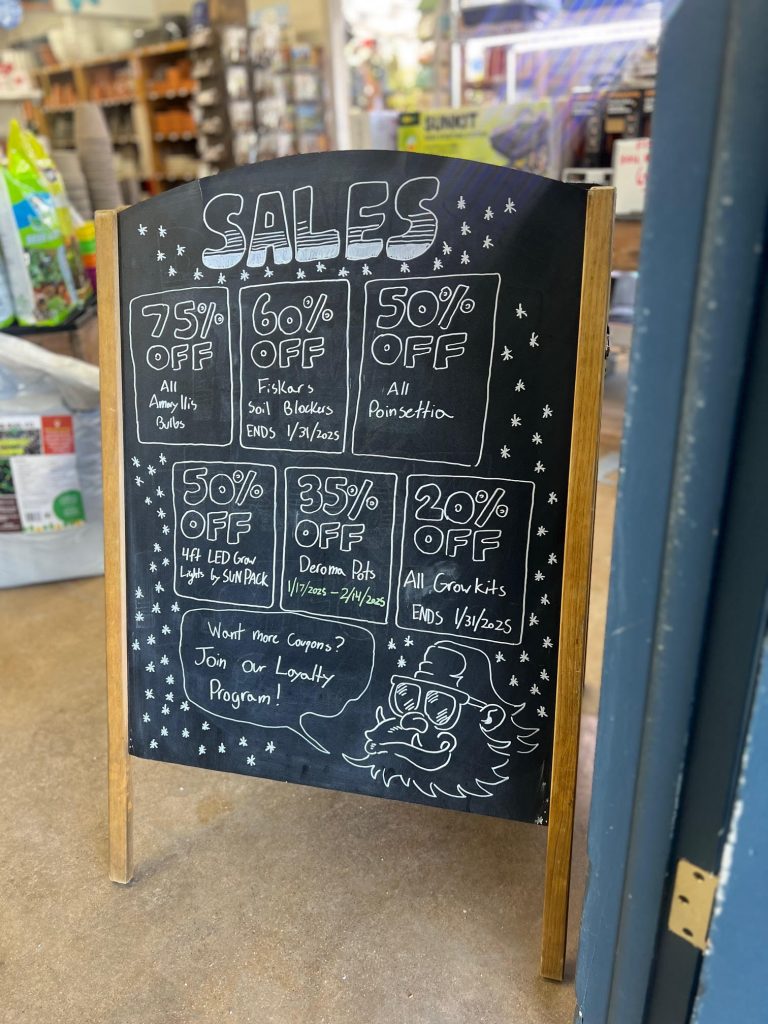
Wednesday: Sales
Thursday: Wild Card Days
Friday: Garden To-Do’s
Winter Houseplant Care: Listen…shhhhh…if you listen closely, you can hear that neglected plant in the corner crying for help. You did not mean to cause harm. Whether you left for your holiday travels in a rush and failed to give your plants some extra TLC before you left, or you do not know the plant’s needs, the stress is equally killing you. You are at the point of not knowing what to do to make your plants happy again. No worries! We got you on our blog! Click here to read!
Seed Starting Indoors: We know it seems early, but the sooner you start your seeds the better. For tomato and pepper plants it’s recommended you start them outside once soil temperatures reach 50 degrees at night. This however doesn’t work well for Colorado’s short growing season. To get the most produce out of your vegetables we recommend starting seeds indoors now and in February! All you need is a seed-starting soil mix and a grow kit! Click here to read!
Starting Seed Troubles?: Have you been waiting for your seeds to pop up and still nothing? No matter what you do, your seedlings perish. There are multiple factors as to why your seeds may not be sprouting. Seed age, crusting soil, and temperature fluctuation are just a few. In the article below by CSU Extension, scientists review why your seeds may not be thriving as they should. Fear not, solutions are provided to fix issues and to get those seeds growing! Happy gardening! Click here to read!
Saturday: Plant Factoids
Interesting gardening and plant facts! We include sources, so in case you want to learn more you can find that information!
“Proper light levels are important for the health of the rubber plant. They do best in medium to bright filtered light. Unfiltered, direct sunlight can damage leaves.”
-“1326 – Rubber Plant – PlantTalk Colorado.” Colostate.edu, 2025, planttalk.colostate.edu/topics/houseplants/1326-rubber-plant/. Accessed 18 Jan. 2025.
“Only feed or transplant a Norfolk pine (Araucaria) when they are actively growing (March through September). To supply nutrients any standard soluble fertilizer formulated for houseplants will do. Araucaria are slow growers and only need to be transplanted when they show signs of being root bound or have roots growing out the base of the container.”
-“1321 – Norfolk Island Pine – PlantTalk Colorado.” Colostate.edu, 2025, planttalk.colostate.edu/topics/houseplants/1321-norfolk-island-pine/. Accessed 25 Jan. 2025.
“Seedlings in soilless mixes need regular fertilization. Apply a water-soluble fertilizer at half-strength a week after seedlings germinate. Then fertilize every two weeks at full strength.”
-“1840 – Starting Vegetable Seeds Indoors – PlantTalk Colorado.” Colostate.edu, 2025, planttalk.colostate.edu/topics/vegetables/1840-starting-vegetable-seeds-indoors/?_gl=1. Accessed 1 Feb. 2025.
Sunday: Highlighted Products


New School Fall Gardening Stretegies
By Katherine Placzek
With fall approaching, many of you are getting ready to put your garden beds and other portions of the landscape to bed. With a more eco-friendly mindset, we would like to suggest a couple of tweaks to your typical routine.
Old school: Raking and bagging leaves, tossing them out for the trash.
New school: Rake leaves from below trees, and use them as mulch around your perennials, shrubs, or on top of your vegetable garden beds. You can also run these over with a lawn mower to mulch them into your grass.
Why: Organic matter, including yard waste, is the most prolific item in United States landfills. Consequently, this unsustainable practice directly contributes to greenhouse gas emissions. Conversely, organic material returned to the soil reduces your environmental impact while providing a useful garden resource. These local sources of organic material and nutrition (from your own yard’s leaves) will feed and insulate your yard all winter long! Decomposing leaf matter enriches the soil, adding carbon and nitrogen to the soil, while plants “sleep.” Leaves also create safe places for native bees and other pollinators. Did you know that almost three-fourths of Colorado’s native bees nest and overwinter underground? Tip: Deeply water the leaf litter in after it has been placed. This creates a wet decomposing mat that will not blow away as easily.
If you have excess leaves that you are not going to be using, please feel free to bring your bagged leaves by our nursery gate (located at 600 N. 18th St. Colorado Springs, CO 80904). This is a community pile that other members come to gather for their own gardening usage.
Old School: Trim any perennials and remove them before the first snow.
New School: Leave all of your woody stalks, leaf matter, and ornamental grasses all winter long!
Why: This allows for winter interest and provides shelter for any hibernating insects. This is especially true for native plants that act as habitat for many native and beneficial insects. Larger life forms, including birds and mammals, will also benefit from grass seed heads left standing, and other plants that provide shelter in the harshest months. If this is unsightly for you, trim your plants, but leave the stems and other leaf matter on the ground to help create shelter throughout the winter. When soil temperature has reached 50 degrees Fahrenheit it’s the preferred time to begin trimming these perennials in the spring, after many insects have completed their wintering cycle.
Old School: Let the winter snows water your outdoor plants.
New School: Water trees, shrubs, and perennials on nice days throughout the winter.
Why: Unfortunately Colorado Springs does not get enough reliable winter moisture to overwinter many plants. This is especially true for newer plants that do not have an established root system yet. Many trees and shrubs, even those that are well-established, should continue to be watered on warm winter days from October through March. When it gets up to 40 degrees Fahrenheit, pull out a hose or dust off your watering can and soak up some of those winter rays, yourself, while you water. Make sure you unhook any hoses after use, as temperatures can cause freezing in the hose bib and other hardware.
Old School: Say goodbye to gardening until spring.
New School: Fall and winter sow, including vegetable and perennial flower seeds.
Why: Many annual vegetables and perennial flowers have a natural cycle where they drop seeds or fruit in the fall. Mimic nature and plant some of your own seeds in the fall to see what comes up earlier and hardier in the spring! In the vegetable garden, this especially works for cold hardy greens. Think spinach, lettuce, arugula, radicchio, etc. For perennial flowers, like wildflowers, it is recommended to put these seeds down in the fall, as many of our native flowers require a cold stratification period. While many people may set up sections in their freezer and fridge for cold stratification processes, direct seeding in the fall eliminates the juggling of space in your fridge/ freezer. Let the ice cream stay where it is!
Old School: Wait until spring to amend any of your garden beds.
New School: Amend your garden beds in the fall so you can plant right away in the spring.
Why: Fall is a good time to test your soil so you know how to amend your beds. Our soils typically fall in the basic pH range here in the greater Colorado Springs area. This can impact how readily available nutrients are to our plants. Do your research and get your soil properly in shape for your spring! Remember that you can also amend with what nature provides; leaves, manure, compost, and other organic matter. These sources do not have a precise N-P-K (macronutrients: nitrogen, phosphorus, potassium), nor spelled out micronutrients (calcium, magnesium, iron, etc) so it is recommended to test your soil in the spring again to see how your soil has changed due to any unregulated organic material. We offer pH and N-P-K, testing in-store, but the CSU extension office also offers a wide range of soil tests.
Now that you know these new school techniques, you might just try other new gardening techniques in the growing season. I know, I know- I am getting ahead of myself! Happy gardening!
Rick’s Deep Freeze Guide
In preparation for our first deep freeze coming this Sunday, Rick’s Garden Center would like to remind our fabulous customers to take some steps beforehand to help your plant friends and tools out.
- Water in outdoor trees, shrubs and perennials and cover root balls with mulch. Do not mulch up to the trunk. Moist soil conducts earth heat better than dry soil. The mulch will help keep in the heat and protect the sensitive root ball.
- Rose bushes, mulch up to the graft union at the base of the rose trunk. You can use a rose collar or just pile up mulch up to and above the graft union. The graft union will look like a bulging area on the main trunk just above the soil line.
- Bring in any tropical plants, cacti or succulents that are not at least a zone 5 inside.
- Check and move any plants that are blown on by heat vents. This will dry out the foliage in no time!
- Outdoor trees, shrubs and perennials planted in pots should be insulated with burlap bags or mulch and placed against a south or west wall of your home. Avoid watering these before the freeze.
- Water in newly established lawns and grass.
- Go ahead and plant those mums you bought in the ground.. They may come back next year!
- Disconnect and drain all hoses and drips lines from spigots
- Cover newly planted bulbs with leaf, needle or straw mulch.
- Blow out that sprinkler system!
- After the freeze, you do not have to pull up all of the dead material, so that pollinators and other insects have a place to overwinter.

Winter Watering on the Front Range
Our often dry, windy winters here on the Front Range can be especially tough on landscaping plants such as perennials, trees, shrubs, and lawns. Most plants need moisture throughout the winter to prevent root damage, so developing a winter watering schedule can help to protect your landscaping.
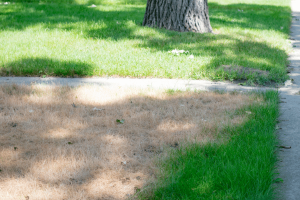
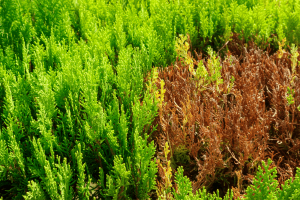
If roots are damaged over the winter, the “winter kill” is not obvious until summer. A plant or lawn may green up nicely in the spring, but in the first hot days of summer, a plant with damaged roots will struggle to take up enough water. This affects the health of the entire plant and can result in the browning of foliage (especially in evergreens and lawns). A weakened plant is more susceptible to pest and disease damage, and in severe cases, the entire plant may die from winter kill. Because our winters often lack consistent precipitation, many plants will benefit from supplemental winter watering.
What plants benefit from winter watering?
Nearly all plants will benefit from winter watering. However, the following plants are especially sensitive to drought injury throughout the winter.
- Recent Transplants
- Plants that are less established have smaller root systems and need more supplemental water to thrive.
- According to Colorado State University Extension, trees take one year to establish for each inch of trunk diameter at planting.
- Bare root plants take longer to establish than container plants.
- Plants transplanted later in the season take longer to establish.
- Evergreens
- Because evergreens retain their needles, they still transpire throughout the winter. Without adequate soil moisture to replace this water loss, evergreens are at a higher risk for winter burn.
- Evergreens at highest risk include arborvitae, boxwood, fir, Manhattan euonymus, non-native pines, Oregon grape-holly, spruce, and yew.
- To help limit desiccation, some evergreens can be treated with a product such as Wilt Pruf® or Bonide Wilt-Stop®. Read the product label for uses and instructions.
- Deciduous Trees and Shrubs with shallow root systems
- Woody plants with shallow root systems are more likely to dry out because they cannot pull water from deep in the ground.
- These include alders, European white and paper birches, dogwoods, hornbeams, lindens, mountain ashes, willows and several varieties of maple including Norway, silver, red, Rocky Mountain, and hybrid maples.
- Herbaceous Perennials and Ground Covers
- Even established perennials and ground covers can suffer from winter kill, especially those without wind protection and those with south or west exposures that experience more freezing and thawing.
- Lawns
- Newly established lawns are especially at risk for winter kill as well as those with south or west exposures.
When should I winter water?
Most plants will benefit from winter watering from October through March.
According to Colorado State University Extension, water one to two times per month during dry periods without snow cover. Windy or sunny sites (those with south or west exposures) dry out quicker and will require more water.
Only water when air temperatures are above 40°F and the soil is not frozen or covered in snow.
Water mid-day or earlier to ensure the water has time to fully soak in before freezing at night. Test soil moisture before watering by inserting a probe or screwdriver into the soil. If the screwdriver goes in easily, watering is not necessary. However, if it is difficult to push the screwdriver in after a few inches, watering is necessary.
What is the best way to apply water during winter?
While water can be applied by hand, typically it is most efficient to water with a soaker hose, drip hose or sprinkler that attaches to a hose. (Do not use an in-ground sprinkler system as these should stay winterized until spring.)
Trees can also be watered using a deep-root fork or needle that is inserted no deeper than eight inches into the soil in multiple locations throughout the dripline and outside of it. As with watering in the summer, it is important to allow water to slowly soak into the soil. This results in deeper penetration and prevents runoff. For trees, water should penetrate to a depth of 12 inches.
How much water do my plants need?
Mulch is crucial to helping soil retain moisture. The following recommendations assume that all plants have at least two inches of mulch. Keep in mind that most sprinklers deliver approximately 2 gallons of water per minute.
Trees
- Apply at least 10 gallons of water for each diameter inch of the tree
- Water once a month (twice a month for newly planted trees)
- Water from the edge of the branches halfway to the trunk, and then two to three times that distance from the edge of the branches outward
Shrubs
- Newly Planted: Apply at least 5 gallons of water twice a month
- Small, established (less than 3 feet tall): Apply at least 3 gallons of water once a month
- Large, established (more than 6 feet tall): Apply at least 10 gallons of water once a month
- Water within the dripline and around the base
Herbaceous Perennials
- Water requirements vary based on level of establishment and size of the plant
- As a general guideline, apply half the amount of water that would be applied in a typical summer watering session once a month
Lawns
- Water lawns if there has been no precipitation for three weeks and the lawn has a south or west exposure
- Apply half the amount of water that would be applied in a typical summer watering session
Resources
https://water.unl.edu/article/lawns-gardens-landscapes/winter-watering