Pond Plant 101
By PFC
Having a pond with plants seems at odds with our drought-ridden state, yet it can be a boon to any garden across the western slope. Ponds create a calming atmosphere and provide homes for wildlife, such as dragonflies and frogs, when stocked with the right plants. What makes our state special is its connection to wilderness, so why not try to replicate our waterways, too?
We likewise understand some are more interested in aesthetics. We also supply visually interesting and beautiful pond plants, though a majority of these beauties are not native, sadly. That doesn’t mean native insects and other animals don’t benefit from these plants, however! We’ll provide information on how to care for pond plants, along with some factoids on our favorite native and non-native varieties. Plus, how to safely handle non-native (and often invasive) pond plants. Happy gardening!
Creating A Pond
Creating a pond is easier than you think! If you lack space or want a cheaper option, consider creating a patio pond. These container-sized ponds are made with just that, a container, though it should be fully sealed to prevent water leakage. A pot that lacks a drainage hole, an old bird bath top, or a fountain basin are prime examples. This container should be at least 12” across and 10” deep to provide adequate space for aquatic plants (CSU, “Water Gardens”). For large plants, such as Victoria waterlilies, this may not be an optimal home for their size (CSU, “Planting”). For large ponds, you will have to dig out an area of the garden and line this spot with pond liner to prevent water from seeping into your soil and potentially eroding foundations (Wildlife Trust). To avoid puncturing the liner, remove sharp stones found embedded within the dug-out pond’s soil (Wildlife Trust). Here is an easy how-to guide on creating a pond: click here!
Substrate
Now that we have our container, the next step is substrate! Many aquatic plants, such as water hyacinth and hornwort, don’t require substrate because their roots are free-floating, acting similarly to gills. Things like our taro, zebra rush, and rain lily do require substrate for their survival. Pond substrates come prepacked, or you can forage your own! For packaged substrate, we actually sell bags of our recommended types in the pond section of our store. If you’re looking for more than 2 cu ft, however, we recommend visiting an actual pond store. Our local favorite is Crystal Ponds! (Click here). Sand likewise works as a substrate! Avoid any substrates with perlite, peat, moss, or bark, which will float to the pond’s surface (CSU, “Planting”). When it comes to foraging substrate for a pond, no need to visit a wild lake or aquatic habitat. In fact, the best substrate may just have been under your feet the whole time! Soils beneath cool-season grasses, like the standard bluegrass, make excellent pond substrate (CSU, “Planting”).
Planting
Regardless of substrate type, planting should take place in the shade or on an overcast day to avoid drying out the roots of aquatic plants (CSU, “Planting”). Depending on the type, pond plants must be planted at specific times of year. Hardy pond plants can be planted from mid-April through May, while tropical pond plants should be planted mid-June, when water temperatures are a constant 68 degrees Fahrenheit (CSU, “Planting”). Tropicals can remain in the pond until the first frost. Hardy pond plants can remain in large ponds over the winter after being pruned, yet pond plants in patio pots should be discarded at the end of the season because they will not return the following year (Zuri). If you wish to try keeping tropical pond plants happy in winter (which is incredibly difficult), they can be stored indoors in a makeshift container pond that must have full sunlight and continually warm water temperatures, at least above 60 degrees Fahrenheit (Zuri). Hardy waterlilies should have old foliage removed and dropped within the deepest part of the pond over winter, where they’ll attain dormancy until the following spring (Zuri).
Feeding Pond Plants
Fertilizing pond plants is one of the most difficult aspects of maintaining aquatic plants. This is especially true if you choose to keep fish, as fish (and other aquatic animals like snails and insects) are sensitive to chemicals found in fertilizers, both synthetic and organic. If you have a pond that does not have any animals contained within it nor is it near any wild waterways, you may fertilize pond plants with aquatic plant food tablets. The brand and its ingredients will determine how frequently you can fertilize. A pond with fish can be fertilized but under specfic guidelines. Fertilizer should be organic and animal-friendly! We sell API products, which are animal-friendly pond fertilizers and cleaners. Here is more information on them: click here! We do not recommend fertilizing ponds that are muddy or have undesirable plants within them (MSU). Fertilizer is non-selective, so it will end up feeding weeds and mud (MSU). Mud actually binds phosphorus from fertilizer, causing plants to become unhealthy (MSU).
Native Pond Plants:
This section’s a bit misleading, as at the moment we don’t have any truly native wetland or aquatic plants in stock. We, however, have a solution for you! We highly recommend you visit Highlands Plains Environmental Center (HPEC for short) either in person or on their website for anything native plant-related! We love this place and sell a few of their perennials ourselves, though nothing aquatic yet. To make it easy, we’ve provided a link for you to visit their website: click here!
Hornwort (Ceratophyllum demersum)
If you want to increase oxygen in your pond, look no further than the humble hornwort! This aquatic plant is native to all continents, save for Antarctica, though it’s considered invasive in Tasmania, Australia, and New Zealand (Monk).* Also known as coontail, hornwort is effective at maintaining a healthy pond environment through photosynthesis, absorbing CO2 and releasing O2 back into the water (thewatergarden.com). Highly oxygenated water improves clarity and reduces the risk of algae, positively impacting the health of your pond’s environment (thewatergarden.com). Because of its versatile nature and ability to survive both in pond substrate or floating in water without roots, hornwort spreads rapidly and easily. In the wild, hornwort forms large clumps in lakes, ponds, streams, and rivers, which create safe hideaways for fish hatchlings, dragonfly larvae, and daphnia (MDC). Waterfowl also love consuming hornwort (MDC). This is one of the most essential pond plants there is! These plants are cold sensitive, so they’ll do best in a heated pond. Plant them at a similar time to tropical plants, as they dislike cold.
Non-Native:
Water Hyacinth
A favorite amongst our aquatic gardeners! Known for its impressive growth, the water hyacinth produces beautiful purple flowers. Though the bulbous foliage can look unsightly, the bulbs are filled with air sacs, which increase the water hyacinth’s buoyancy (Michigan.gov). This, along with their feathery roots, incredible growth rate, and asexual reproduction, makes the water hyacinth one of the fastest-growing plants in the world, and thus an excellent invasive plant, which isn’t good for our local waterways (Gladisitch). Keep water hyacinth contained properly and avoid contact with wild waterways.
Taro
Another non-native pond plant. If you’ve visited the Denver Botanical Gardens, you may have noticed these lush-leaved plants alongside the aquatic scapes. They’re also often sold in corm form under their Latin name, Colocasia esculenta, and look very similar to Alocasia. Oftentimes, as demonstrated by the few featured taro within the pond area of the store, they come with colorful or patterned leaves, ranging from “black” colored foliage to leopard-like variegated spots. The taro, so long as it is kept properly wet in pond shallows, can tolerate high heat due to its tropical origins (Pondmegastore.com). It rarely becomes invasive in Colorado, but in Southern states it’s considered invasive. However, unlike many other tropical pond plants, the taro can make an excellent and extravagant houseplant! Its soil should remain continually moist, its lighting should be bright, and humidity is a must if you’re interested in overwintering taro.
Yellow Rain Lily
Though not truly native to Colorado, the yellow rain lily is native to the tropical Americas, primarily Central and South America (Wiki, Nov 2024). The rain lily is also known as magic lilies because they appear right after a heavy rain, blooming from thin air (Chalily). The flowers appear similar to crocus flowers, bright and cheery! In addition to their delightful visuals, certain rain flowers bear a sweet fragrance, particularly at night, which attracts nocturnal pollinators such as moths and beetles (Wiki, June 2024). There are over 3,000 moth species in Colorado, and many are essential to our garden’s health (Powell). Though there is potential for the yellow rain lily to become invasive, if handled with care, it is highly unlikely.
Water Spangles (Salvinia minima)
Also known as water velvet, water spangles are a type of floating fern which behaves similarly to duckweed (ISSG). Originally from South & Central America, water spangles behave similarly to duckweed; thus, they can spread excessively and are considered incredibly invasive (Tulane). It does have an attractive appearance, however, and can make a great cover for fish within ponds and aquariums so long as parts of the plant are occasionally removed to prevent overcrowding (Aquatic Arts). If left untreated, water spangle can easily smother a pond or aquarium, limiting O2 and potentially harming aquatic life, from fish to bugs to other plants. Due to its nature, water spangle should NEVER be near wild waterways.
Working With Invasive Pond Plants
In order to prevent the spread of non-native pond plants into our waterways, you must manage the keeping of and disposing of these plants with utmost importance. Any plant that grows rapidly must be safely disposed of to prevent overcrowding. While you may feel guilty about disposing of these plants, you are being a hero to our native flora and fauna, allowing them to thrive in their natural habitat by preventing ecological competition. There are a few ways to get rid of aquatic plants safely; the best practice is to “cook” invasive plants or to compost them (Mattrick). To cook a plant, simply leave it on a concrete surface and pin it down with a rock (Mattrick). Allow the sun to fry the plant for a month until it’s completely dead, and then it can safely be disposed of (Mattrick). To compost, simply add invasive aquatic plants to the top of the compost pile to dry out and eventually decompose. This should only be done with invasive aquatic plants, as invasive terrestrial plants can still spread seed via compost (Mattrick).
*Hornwort may be native to North America however this variety isn’t historically found in Colorado. Hornwort has adapted to Colorado waterways and isn’t considered invasive
Aquatic Arts. “Water Spangles (Salvinia Minima), Aquatic Arts Grown!” Aquatic Arts, 2026, aquaticarts.com/products/water-spangles-salvinia-minima-aquatic-arts-grown?srsltid=AfmBOorcqi3gRLve-PJDeVJlkSiPGllf7hz0_dEUGKPvzA-lCR7PxO5D. Accessed 29 June 2026.
Gladitsch, Haley. “Water Hyacinth (Eichhornia Crassipes).” Long Island Invasive Species Management Area (LIISMA), 18 July 2022, liisma.org/water-hyacinth/.
“Hornwort. One of the Best Oxygenators You Can Have!!!.– the Water Garden.” Thewatergarden.co.uk, 2024, thewatergarden.co.uk/hornwort-one-of-the-best-oxygenators-you-can-have/.
“How to Build a Pond | The Wildlife Trusts.” Www.wildlifetrusts.org, www.wildlifetrusts.org/actions/how-build-pond.
ISSG. “Issg Database: Ecology of Salvinia Minima.” Archive.org, 2026, web.archive.org/web/20121116204858/www.issg.org/database/species/ecology.asp?si=570&fr=1&sts=&lang=EN. Accessed 29 June 2026.
“Louisiana Invasive Species.” Tulane.edu, 2026, is.cbr.tulane.edu/Species_CommonSalvinia.html. Accessed 29 June 2026.
Mattrick, Christopher . “Managing Invasive Plants: Methods of Control.” Conservation Notes of the New England Wild Flower Society, 1 Feb. 2008. Accessed 29 June 2026.
MDC.“Coontail (Hornwort).” Missouri Department of Conservation, mdc.mo.gov/discover-nature/field-guide/coontail-hornwort.
Monk, Emma. “Hornwort | MPI Biosecurity New Zealand.” Archive.org, Biosecurity New Zealand, 2026, web.archive.org/web/20121205035215/www.biosecurity.govt.nz/pests/hornwort. Accessed 22 June 2026.
“POND|PLANTS|WATER LILIES|WATER|GARDEN|PLANTS|LOTUS.” Pond Megastore, 2026, pondmegastore.com/collections/taro-plants?srsltid=AfmBOopfWXy9FYwzzHfuMhQZRcFz-il_N5m8yzQRNLPUg5Brn0utQHni. Accessed 29 June 2026.
Powell, Lori. “Discovering the Hidden World of Nocturnal Pollinators – Cottonwood Institute.” Cottonwood Institute, 22 June 2026, www.cottonwoodinstitute.org/upcoming-events/hidden-world-of-nocturnal-pollinators/. Accessed 25 June 2026.
“Yellow Rain Lily Shallow Water Plant – Chalily Ponds & Gardens.” Chalily, 22 June 2026, www.chalily.com/product/rain-lily-yellow/?srsltid=AfmBOoqAv_BJILgcYmduz-zWJ1ocGBDGXu6dJtK67K81_kUDiD6-mI_d. Accessed 22 June 2026.
“Water Hyacinth.” Www.michigan.gov, www.michigan.gov/invasives/id-report/plants/aquatic/water-hyacinth.
“1026 – Water Gardens: Planting Aquatic Plants – PlantTalk Colorado.” Colostate.edu, 2026, planttalk.colostate.edu/topics/annuals-perennials/1026-water-gardens-planting-aquatic-plants/. Accessed 27 June 2026.
Wikipedia Contributors. “Zephyranthes.” Wikipedia, Wikimedia Foundation, 29 Nov. 2024.
Zuri, Jennifer. “5 Ways to Prepare Your Pond Plants for a Healthy Winter.” Aquascape, Inc., 22 Sept. 2025, www.aquascapeinc.com/water-gardening/pond-plants/5-ways-to-prepare-your-pond-plants-for-a-healthy-winter?srsltid=AfmBOoo7pwUTah2xSzrEjzrYzZIuLbP0gRZHfq56yqZV4qKgke7Mq5Xg. Accessed 27 June 2026.
Guide To Hardening Off Tender Plants
Growing Onions 101
Our onion, leek, and shallot sets have just arrived, which means it’s soon time to plant them! These flavorful plants are a clear favorite for cooking around the world and are surprisingly easier to grow than most expect. But there’s a first time for everything we understand, so with the recent arrival of these bulb producers, we thought we’d write an easy guide to allium care! So, don’t sweat about day length, fertilization, fungal disease, and soil types; we’ve got you covered!
Onion Day Length Guide Explanation
Figuring out and finding an onion that fits your area’s “day length” standards is initially intimidating. “Day length, that is, the duration of daylight hours within 24 hours, is influenced by the Earth’s tilt. Thus, various amounts of light reach different parts of the Earth throughout the year. Likewise, latitude influences what onions you can and can’t grow. Places with higher latitude (the closer you get to the poles), your day length is extended in summer” (Jameson). This is flipped for places closer to the equator in winter. Certain onions won’t survive beyond the equator, while others won’t survive near the equator, as onions are extremely light-dependent. Now, to keep it simple, our store typically only carries onion varieties suitable for Colorado, which typically has Intermediate-day summer growing periods. You can likewise grow Long-day onions further North in our state. To find out what day-length range your state is, click the link here: Click me!
Planting Time
“Plant onion sets from April to early May (for zone 4) or four to six weeks before your last frost date. If your soil isn’t workable, onion sets can be stored for roughly three weeks in a cool, dark, and well-ventilated space” (Dixondale). DO NOT put them in water.
Perfect Soil
One perk about onions is that they grow well in a variety of soil types! “So long as your soil has excellent drainage, to avoid rot, you can grow onions in sandy or clay-dense soil” (CSU). Just make sure to amend said soils with organic material to generate better aeration (especially for clay soils). We recommend organic materials, such as Cotton bur compost or humus, to help. The onions wouldn’t shy away from nutrient-dense soil! “To amend soil for onion beds, you’ll apply 1 1/2” of green compost or humus over the desired beds, and work said material 8” deep into the soil” (CSU). Likewise, the spot onions will be planted in MUST HAVE good sun (exemplified in the day-length paragraph).
Fertilizing
Start strong with fertilizing your onions by testing your soil. You’ll want a nutrient-rich soil with a balanced NPK ratio with no excess. “Onions require a good dosage of nitrogen; however, too much leads to early maturing and produces poor bulbs. While liquid fertilizers are fine for onions, slow-release solid fertilizers are better, especially if they’re organic. You’ll side-dress onions to fertilize them by scratching in the slow-release fertilizer above ground six inches away from the onion plants. You will want to do this after roots establish and only once or twice per growing season” (UM).
Watering
“Onion roots are shallow and thus sensitive to changes in moisture. Make sure to water frequently, never allowing their soil to dry out. If you allow them to dry during the bulbing stage, bulbs will be small and leathery” (CSU). Our 2025-2026 winter has been dry, and our summer will be too (most likely), so make sure to water your onion sets from now until harvest. An inch of water a week should be perfect, but keep a close eye on them regardless. “Cease watering entirely by August, or when the tops of the plant lie over on the ground. The food made in the leaves will supply the onion with nutrients from this point on” (CSU).
Fungal Issues & Insects
Sadly, it’s not all champagne and caviar with growing onions. “One infamous insect that loves onions are thrips” (CSU). These tiny flying lice-like bugs feed by puncturing leaves and sucking out the sap. They especially love onions, so non-systemic insecticides are essential for keeping them away and exterminating them. Onions also suffer from various fungal issues and diseases, from purple blotch to mildew. Always stick to organic fungicides when protecting onions and never systemics, otherwise you won’t be able to enjoy your crops! If you’re interested in learning more about onion diseases and fungal issues, check out a few articles featured below:
Disease & Fungus: Click me!
Insect Control: Click me!
Soil-Borne Diseases: Click me!
Weeds
Onions are susceptible to weed choking. “Get onion beds free from weeds with organic preemergents (such as corn meal), raking them into the top inch of the soil” (Dixondale). Preemergents will halt weed seed germination for six weeks, but established weeds will remain. Do not use any other herbicide and weed by hand with a hoe, dandelion popper, etc.
That’s just the basics when it comes to growing onions, shallots, and leeks from sets. For further questions, we highly recommend you check out the sources below or the others featured within this article. Feel free to visit the store for help from our staff or email Colorado State Extension Q&A for questions. Don’t let the onions frighten you, happy gardening!
Jameson, Molly. “Understanding Short-Day vs. Long-Day Onions | Panhandle Agriculture.” Ufl.edu, 2024, https://nwdistrict.ifas.ufl.edu/phag/2024/07/26/understanding-short-day-vs-long-day-onions/
“1808 – Growing Onions from Seed – PlantTalk Colorado.” Colostate.edu, 2025, https://planttalk.colostate.edu/topics/vegetables/1808-growing-onions-seed/
“Growing Onions in Home Gardens.” Extension.umn.edu,https://extension.umn.edu/vegetables/growing-onions
“Onion Planting Guide – Dixondale Farms.” Dixondale Farms, 16 Apr. 2020, https://dixondalefarms.com/onion-planting-guide/?srsltid=AfmBOopg3208TqFNnzA7QA7bRfa1G1ElBS05UPDSmU2tczB506uMrrrB
Colorado Seed Starting 101: Advice From Rick’s Grow Team
If you want lots of fruits and veggies come summer, the best gardening advice we can offer you is to start early and indoors. Colorado’s growing season is too short for many garden favorites. Eggplants, peppers and tomatoes do not have enough time exclusively outdoors to produce a bountiful harvest. That being said, we’d like to share some of our own techniques for extending the season. Starting seeds inside is the best way to get this jumpstart on the season. And I can thank our spectacular Grow Team, particularly Emma & Jenn, for the helpful advice! If you are a seasoned gardener, or this is your first season growing a garden, enjoy some of our best tips for being successful at seed starting.
Days To Maturity & Pre-Planting
As previously mentioned, Colorado’s growing season is short. When I visited Missouri one time, I was amazed that communities had tomatoes ready to harvest by June, and all of them were grown outside, from seed! Colorado gardeners can have full bushels of tomatoes come June also; we just have to start early and indoors. The best way to plan for this is to research days to maturity for each plant and start according to these specifications. Depending on when the plants reach maturity, you should sow seeds indoors an additional 4 to 6 weeks before the last frost date. For example, peppers need about 85 days to reach maturity. With a bit of math, 85 days turns into 12 weeks. Maturity refers to the number of days it takes the plant to produce fruit. Add four to six weeks on top of that for germination, then research your area’s last frost date through a trusted weather channel. Colorado Springs is typically on May 8th or even Mothers Day. Just to be safe, we’ll use Mother’s Day as a guide for our planning going forward. Subtracting roughly 14 weeks from May 10th means the optimal planting date is January 18th. A little late, but that doesn’t mean you can’t plant peppers; they’ll just fruit a little later! You can find maturity information on the back of seed packets. We’ll also provide a link below this paragraph to one of our favorite references, Colorado State Extension, and their incredible Colorado Vegetable Guide. Click here to read!
Drainage, Drainage, Drainage!
A major seed killer is overwatering, which is easy to do. However, raw seeds need to remain moist until cracking appears, which creates a conundrum in terms of watering. Both Jenn and Emma recommend a combination of fine-draining growing medium and special watering techniques to avoid this. In terms of growing medium, our Grow Team actually starts seeds in vermiculite. It has to be coarse for the best aeration, but if you water less, fine-grade is alright. Seedlings will stay in vermiculite for two weeks, then will be transplanted into a special seed soil or Foxfarm’s Happy Frog soil. Why do we not keep seeds in vermiculite permanently until they can go into larger pots? Vermiculite isn’t great at storing nutrients for seedlings, which obviously isn’t a benefit if you want to grow delicious, healthy, and strong vegetable plants (or any plant). And in terms of watering, we use misters, not watering cans or a hose. Keep the medium moist but not soggy. It’s the Goldilock’s ideal for the seeds!
Warm Bottoms, Cool Tops
A trick to creating a perfect environment for seeds, Emma told me, is to keep the following phrase in mind: warm bottom, cool tops. She and her grow team raise a majority of our vegetable starts in one of our many greenhouses, including a major crop of our tomato varieties. In the greenhouse, we have enough space to use heating mats, and regulate temperature with a greenhouse heater. We also understand many readers aren’t as lucky when it comes to such growing conditions. If you live in an apartment, a small home, or are on a budget, where do you even start, much less keep in mind the mantra “warm bottoms, cool tops?” Let’s translate the quote and make alterations. Seeds should have a warm and inviting substrate to thrive in, preferably one heated by a heating mat. Hence, the “warm bottoms” of the first half of the mantra. Whether growing in a greenhouse or at home, we always recommend a heating mat. It emulates summer growing temperatures that vegetables, like peppers, need. We carry various heat mats, some with timers and others without, that would work perfectly for a smaller grow setting. These mats should be set between 80 to 70 degrees Fahrenheit.
What about the meaning of “cool top?” In our greenhouse, there’s the heater, but even now, the environment is still considered “cool” compared to summer temperatures. The contrast between soil and air tells the seed which direction to grow, establish roots in the warm earth, whilst the stalk should reach to the cool air above ground. The air cannot be too frigid, however (hence the greenhouse heater), or else the sprout will have stunted growth or die. In a home operation, we recommend growing seeds in a warm spot with full sun, using a plastic greenhouse cover only when the sun moves away to keep in the heat. The space you plan to grow seeds in, shouldn’t go below 68 degrees Fahrenheit.
Light On The Subject
This is essential for growing seeds at home, Jenn mentions, “as much light as possible is essential for starting seeds.” And we’re not talking about keeping seeds by windows. We’re talking grow lights, which sounds like overkill to many, but if you want to avoid leggy plants they’re a must. Have you ever grown seeds at home and noticed that as they mature, they become long, stringy, and weak? This is what we mean by leggy. These plants are desperate for light, but without enough, they cease to function since photosynthesis depends on sunlight. Jenn recommends keeping the grow light as close as possible, and eventually “upgrading” seed domes (which is where the grow light can rest upon). This is the best way to avoid leggy seedlings.
Quick but helpful tips (we hope) to Colorado seed starting! We know gardening can be expensive, and some of these supplies will be, but in the end, nothing beats the pride of using your own plant starts for the summer. Plus, your wallet will thank you in the long run, too! Happy gardening!
AI & The Garden: A Hard NO
If you’re a gardener, you should be aware that relying on AI can be dangerous. Running the AI data centers are detrimental to the environment, consuming 10 times the normal electricity compared to other search engines (UNEP, 2024). And what’s the point if it’s inaccurate? We’ve had numerous issues with AI spouting nonsense to all our wonderful customers and we don’t want your gardens, landscaping projects, or interior decorating ruined because of it. In this article, we’ll go over how to spot AI and what to use instead.
AI is transforming the plant industry at an exponential rate and not for the best. Sure, you can get information about plants, gardening techniques, and more using Chat GBT or a AI-run plant app but how accurate is this information? AI pulls its data from various sources across the internet, from downloaded books to “even those funny Reddit threads” (Climate Vault, Dec 2024). We’re sure you can recognize a red flag here: AI pulls information from ANY data online. AI can be trained to select data from certain sites but it can’t differentiate between reliable and unreliable sources. This leads to false information being shared on plant apps, the Google search settings, and even AI-generated images as fact. We can’t tell you how frequently misinformed customers come in because of AI. We have a good rule of thumb to keep in mind when it comes to AI identification: if it’s too good to be true, that’s because it probably is.
Too Good To Be True
Have you been recommended home remedies to care for sick plants? Or have you been shown images of plants that seem unreal, like deep blue leaves or neon magenta flowers that glow? These are all examples of AI displaying “too good to be true” facts and images. Gardeners in the know are aware there’s no such thing as a fully blue colored plant, that’s impossible because plants absorb light from blue and red light waves and reflect the green wavelength. Some plants appear blueish or even purple yet are never the color displayed by AI, exemplified below. Another sign (and poor recommendation) of AI is through plant apps’ advice. As we mentioned before AI absorbs and relays information from collected data all over the internet, including from memes (online jokes), unprofessional advice from Reddit and other websites, and non-scientific sources. AI in plant apps thus recommends that knowledge be treated as fact when it comes to identifying or recommending products to treat sick plants. Customers come in all the time with spotted leaves on houseplants and outdoor plants and through a plant apps “advice” been recommended inappropriate care, like supplying fertilizer when it’s a fungal issue. The fertilizer might help the plant bounce back but doesn’t eliminate a fungus, only a fungicide will do that. AI will also recommend homeopathic “remedies” for plants based on this collected data, like using honey to stimulate root growth on cuttings or using dish soap to treat for insect eggs. Sounds too good to be true right? You are correct, these claims are advertised as cheap but aren’t rooted in science and are often pulled from untrustworthy data. Honey has been shown to have limited effect, but very minimally, and rotting often occurs before root take a hold. And using dish soap on plants will kill your plants before killing insect eggs. Seasoned gardeners and plant people would be suspicious of these recommendations but those new to the lifestyle may be caught unaware and taken advantage of.
How to Spot AI Via Images
AI learns and thus it becomes increasingly difficult to differentiate real photos and AI-generated photos. Realistic but not perfect, thankfully there are still techniques to spot AI in photos:
Strange Details: Focus on the details of a photo you question. Are plant leaves melding together? Or do flowers seem way too bright? Almost glowing? No matter how small the detail something will be wrong with its appearance, indicating AI-usage. Data is collected and generated into a new image yet AI isn’t tuned enough to make it appear natural. Another great detail to look at is if a blossom appears identical to another in the picture, AI is essentially just copying and repeating the same feature in one photo.
Too Perfect: Aesthetics are important when it comes to internet images. Things must be perfect and AI tends to make things too perfect. AI-generated photos tend to lack realistic details, forgetting about the tiny hair like roots of a potted plant or a certain leaf pattern, instead giving an airbrushed appearance to the photo. Or the background environment might be incorrect for the plant featured in a photo, like tomatoes being displayed in a cold setting. Too perfectly aesthetic are red flags and their source, information, or appearance should not be trusted.
These are only techniques to handle photos, however. Rely on the professionals, like academics and scientists, for plant knowledge.
How to Spot AI: Discovering the Source
There’s a final trick up our sleeves for discovering what images or data snippets are AI-generated or not and it involves a little extra work. Are you familiar with the reverse image search?
Google Image Search: Have you ever downloaded a plant picture and are suspicious of its authenticity? Introducing the Google Image search. Simply open up a tab in Google, click the little camera in the search bar, upload that mysterious picture and you should be able to trace its origin. If the image comes from an academic source, a college, a published research magazine, or an established agricultural company chances are the plant displayed in the said photo is the real deal. If the image is tracing back to a single source and it’s on a shady website or a single page on Amazon chances are not only did you stumble upon an AI-generated image but it’s being used in a scam. Distrust the photo immediately and continue to rely on the professionals.
The Professionals: Who to trust
The best sources for plant advice ALWAYS come from professionals: academics, scholars, and scientists. Academic websites, university & college websites, scientist-run online journals and blogs, and more are all excellent places to source plant information and research. Science is evidence-based, meaning scientists study topics through experimentation. To think about the reliability of science is to think about the reliability of the car. “Most of us trust our cars, ” says Naomi Oreskes, a professor of the history of science at Harvard, “The modern automobile is the product of the collected work and wisdom and experience of every man and woman who has ever worked on a car. And the reliability of the technology is the result of that accumulated effort (Oreskes, 2017).” Real people analyzing trusted research, not just general data, is why science and thus academia should always be trusted and referenced. AI has no peers to check it and keep it real, though in time that may change. But in the meantime stick with the professionals.
We Ricksters use Colorado State University Extension as our main source for information. There are hundreds of free articles on whatever subject you could imagine. And there’s even a Q&A panel where you speak with real researchers, not an AI-driven help bot! To check them out, click these links:
Colorado State University Extension Page: CLICK HERE!
Colorado State University Extension Q&A: CLICK HERE!
Another great source of FREE information is the library! A librarian may not be a gardener but they’re trained in the art of finding trustworthy sources and good material. Use them or the library’s search features to hunt down trustworthy authors and information.
From college websites to libraries, there are numerous trustworthy sources for your plants. And even though AI is learning every day and becoming better, no one can do it like the pros. Plus, AI is bad for the environment, and using it is not cool. It uses thrice as much power as normal search engine, uses rare earth materials, and produces crazy amounts of electronic waste. Happy gardening and happy researching!
Sources:
“Industry News from 3BL Media: The Impact of AI on Carbon Emissions.” My Green Lab, December 4, 2024.
“AI Has an Environmental Problem. Here’s What the World Can Do about That.” UNEP. Accessed July 7, 2025.
Oreskes, Naomi, “Why Should We Believe In Science,” TED Radio Hour, February 24th 2017, 13 Minutes.

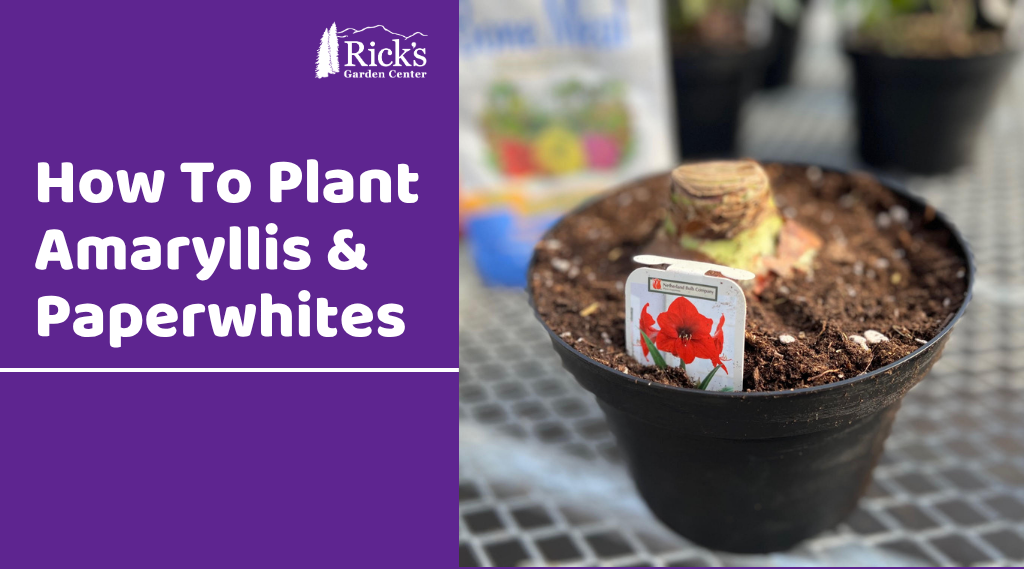
How To Plant Amaryllis & Paperwhites
Our holiday bulbs are here! Make way for Amaryllis & Paperwhites! Because these plants need to be planted about eight to ten weeks in advance, to flower around Christmas, we thought we’d provide this care guide now. Caring for and planting these bulbs is surprisingly easy!
How To Plant Holiday Bulbs
Ingredients:
-Bulbs, one Amaryllis or ten to eight Paperwhites.
-Well-draining soil (we’re using Fertilome Ultimate Potting Soil).
-8 Inch Container.
-Bulb fertilizer (we’re using both blood meal and bone meal).
Step-By-Step Guide
1.) Let’s start with the substrate. To prevent rot, pick soil with excellent drainage for these bulbs. We prefer Fertilome Ultimate Potting Soil, but Fox Farm’s Happy Frog works too. Gardners occasionally plant Amaryllis in a succulent mix, replicating their natural arid environment. Be cautious with this approach because it requires more watering due to extremely well draining soil.
2.) Once your soil is selected, fill about two-thirds of the container of your choice. Here, for both paperwhites and amaryllis, we’re using an 8 inch nursery injection pot. But you can use any kind of container. Having a hole for drainage is essential, and bulbs need some wiggle room.
3.) We advise fertilizing bulbs with a slow-release organic fertilizer. Whilst bulb-specific fertilizer, like Espoma Bulb-Tone, is ideal due to phosphorus levels, a flower fertilizer likewise works. Here, we choose to use blood meal and bone meal, high sources of nitrogen and phosphorus. We’ll eyeball the amounts because with them organic and a slow-release fertilizer burn isn’t a high concern.
4.) Plant your bulbs! Make sure roots are pointing down to the bottom of the pot, tip pointing to the sky. In fact, about one-third of the top of the plant should be above the soil. Amaryllis should have an inch and a half of space around the bulb and enough depth to properly root out. Paperwhites can be planted close together, but bulbs shouldn’t be touching. Think of how an egg carton is arranged! They should also have good depth for their roots to grow.
5.) Now, give the bulbs a light water. This helps pack them in. Rot is the primary cause of death for bulbs, so maintaining a good watering schedule is essential for their survival. We recommend watering every other day in a dry environment, less so in a humid environment. Lower watering to once every four days once green sprouts appear.
2025 Fall Donations: Giving Back to the Local Community
By Katherine Placzek
November is the month where humans best emulate nature-we participate in the magic of giving without the expectation of receiving in return. I hope you all find abundance in your lives, and pass it along to others in small and big ways.
This fall, Rick’s Garden Center donated over $22,000 worth of trees and shrubs to local organizations that benefit the Colorado Springs community. Read on as we highlight their missions. Maybe you can find a way to support their mission or be inspired to find another non-profit group you can volunteer at, or share your monetary gifts. Rick’s vision has always been to help beautify El Paso County and beyond with plants. What is yours?
Mountain Song Community School
An elementary and middle school (grades K through 8), Mountain Song Community School, is a public school that is also a member of the Alliance for Public Waldorf Education. The Waldorf model nurtures the body, mind, and heart of each student. Mountain Song’s curriculum also includes the Agricultural Arts- something Rick’s Garden Center can get behind! Our donation helped further build the berry and native plant portions of their gardens. You can check them out here: Click here!
Flying Pig Farm
Flying Pig Farm is an educational farm located in Manitou Springs. They “… nourish our community and the land we steward by hosting school and community groups and events, facilitating workshops, supporting community gardens, consulting and collaborating with partners, cooking and sharing food, promoting creative expression, holding seasonal festivals, and advocating for healthy relationships with people and the planet.” What a cool mission! They consistently create exciting new community events and educate the local population of all ages about agriculture and self-sustaining techniques. Our donation helped build a “fledgling hedgerow” to offer further privacy and a noise barrier on the farm property. Please check out their programming here: Click here!
TESSA of Colorado Springs
TESSA offers immediate safety for victims of abuse. They have safehouses for women, children, and other victims. They empower and support these individuals while helping them build a safer future. They have several sister programs and are an important part of our community in Colorado Springs. We were able to help re-landscape a portion of their office outdoor space to feel welcoming, but still safe. TESSA provides space for victims to know they are worthy of goodness. This donation will allow them to know they are worthy of beautiful things. Support them in their brave mission: Click here!
Rock Ledge Ranch (in Partnership with the CSU Extension Office)
The Rock Ledge Ranch is a historic ranch, and park at the cusp of the Garden of the Gods Park. They have educational programming while maintaining historic grounds. The CSU Extension is working with them to rehabilitate soil and build a historically authentic greenhouse that will further their educational offerings. We were able to donate native trees/shrubs as well as berry bushes that will help make their grounds feel appropriate to the time, while continuing to support the vision of soil restoration. To support their continued efforts in raising money for the greenhouse construction and to attend their programs, head here: Click here!
Colorado Springs City Horticulture Department and Forestry Department
Our city runs on the funds from the local sales tax. When consumers slow buying, or there is a dip in tourism, like we saw this summer, that revenue becomes strained for our local city departments. Some departments are beginning to see budget cuts or hiring freezes. We were able to help both the Colorado Springs City Horticultural Department and Forestry Department. They both obtained trees/shrubs for beautifying our city and community spaces. Berry bushes and grapevines will be planted in community gardens, and shrubs and trees will find homes in parks, medians, and other public recreation spaces. Check out the City of Colorado Springs website here: Click here!

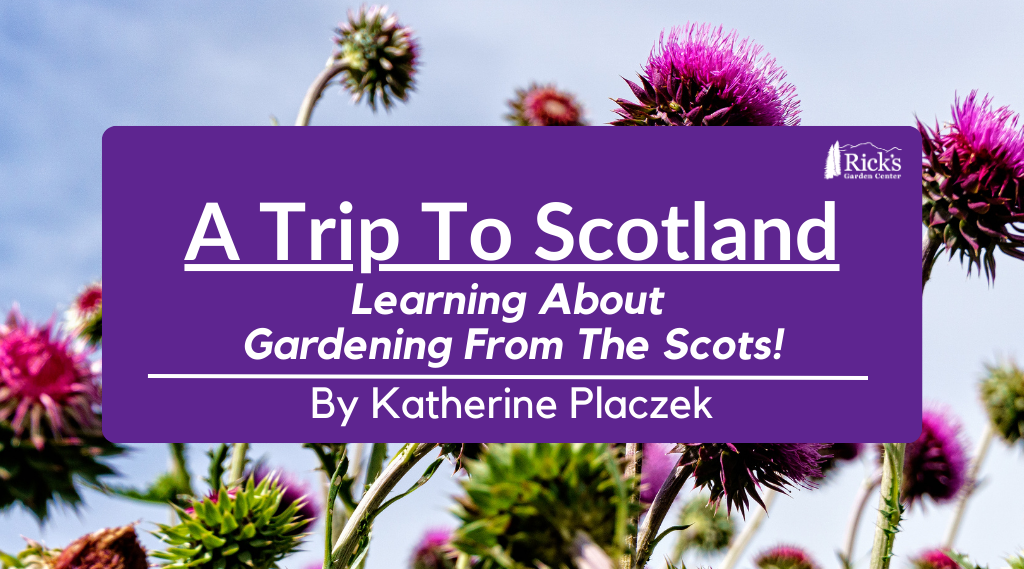
A Visit To Scotland: Learning About Gardening From The Scots!
By Katherine Placzek
Recently, I was able to go to Scotland for vacation. While I was there, I was blown away by the plant life, of course, but I also learned so many new ways to garden! In this blog, I want to share my main takeaways with you!
- Plant Small
I was able to briefly chat with someone who worked at McLaren’s Nurseries in Lugton, Scotland. This man told me that most of their plants are grown in smaller sizes because Scotland’s conditions are very harsh. They deal with a lot of wind, adverse weather, and salt from the ocean. With these conditions in mind, they think younger and smaller plants have a better chance of successfully transplanting and thriving. Many plants have severe transplant shock if they are larger. This made me think of what I have discovered on my own. Starting plants by seed or in smaller sizes in our harsh region has proven incredibly prosperous for me. I believe the premise is the same here in Colorado!
- Plant Wildflowers In Your Yard & Even In The City Roundabouts
The Scots are pollinator warriors! They interseed their lawns and roundabouts with wildflower seeds. They will mow a neat border, following the perimeter of the curb or the boundaries of their yard. BUT they leave the interior tall with poppies, scabiosa, daisies, other small wildflowers, and grass seed heads. It feels like a bit of the countryside has been transported into the heart of the city! I was happy to see bees and butterflies, as well as birds, enjoying the small habitat. What a beautiful way to encourage a little bit of wilderness into your yard, while keeping it tidy.
- Honor The Weeds
Scotland’s national flower is the thistle. The thistle. You read that right. We Americans have a vendetta against weeds- I just sold some Thistledown (a broadleaf chemical control for Thistle and its cousins) this morning. We do not see how beneficial weeds can be. The Scots have a different approach. Thistle is everywhere! In yards. By the sea. In the pasture. In the Highlands. Growing in a crack by a restaurant. It is honored in all forms of artwork in Scotland. It is found on postcards, in small artist studios as their main muse, below the statue of William Wallace in Sterling, and even on the handle of the sword of state held in Edinburgh Castle (gorgeous- btw). And it is not just thistle. They allow and sometimes even encourage the brambles- the wild blackberries. Brambles are by a stone wall overlooking the ocean. They skirt the perimeter of a park. They creep along the edges of a city forest. They climb over a rock wall where a couple of tourists are eating lunch. The brambles are even sometimes featured in local alcohol with the phrase, “sun-kissed bramble fruit.” All of these little corners where weeds are allowed to thrive remind us that we are part of nature, despite how much we try to separate ourselves. Pollinators and other wildlife benefit from these little habitats, also!
- Garden Even If The Plant Will Not Stay Perfect
I was able to visit many seaside towns in Scotland. While some shops and gardeners had given up on planting in the sea-sprayed side of town, many had not. They still planted window boxes or patio pots with begonias, impatiens, salvia, petunias, and the like. Many of these plants are not resistant to the salt in the seaside wind or spray from the ocean. There were pots that were protected from this, and they looked great, but others got the full brunt of the sea and looked very ragged or brown. It reminded me of Colorado. While we could throw up our hands and say that we live in the land of hail, deer, squirrels, and grasshoppers, and that “this is no place to be a gardner” we do not. We replant our tomatoes after hail. We install semi-permanent cages around tender trees and shrubs from the nibbling deer. Gardeners will garden, no matter the conditions. We believe in plants and we believe in beauty. We plant even if we know that the planter full of beautiful flowers will not stay perfect forever.
- Plant A Hedge
Hedges were the first fences. They border the road and soften sound pollution in Scotland. Hedges also create boundaries along property lines and offer privacy. I think that more hedges should be planted here in Colorado. While hedges sometimes are monocultures of one plant or shrub, they can also be very diverse. I saw Scottish hedges with cotoneasters, privets, various plants from the prunus family, shrub roses, beeches, etc. While many of these hedges were manicured, they had incredible diversity. Again, a variety of pollinators and other wildlife could find food and shelter in these hedges. If you are not into the “traditional hedge” that is trimmed into straight lines, feel free to check out Floret’s hedgerow guide. I think it is an excellent “new world” take on an “old world” idea. You can find that guide here: Click me!
Although building out a hedgerow can be expensive, if you go back to the first point (#1- Plant small), you might have a much better success rate and a less expensive ticket at the end of your hedgerow project. Some nurseries will even ship small seedlings if you want to start very small.
While Octorado Native Plants Nursery is only Wholesale, more nurseries are heading this way! Read more here!
- Plant In A Pot
Many people live in cities in Scotland, and you would expect those who live in small apartments or places without a yard to forgo gardening altogether. Not at all in Scotland! Window boxes and patio pots adorned nearly every block. Some may have been neglected or battered due to sea salt, but plant life was abundant and encouraged even in apartment living. Gardening really is for everyone!
- Develop Around What Already Exists
While Europe is known for its broad-scale deforestation in its historical past, we did see several old trees or portions of forests left intact. We saw an ancient yew tree that was the size of a building! This was in the middle of the city, Stirling. It was sitting close to a parking lot and was in the middle of the hubbub. This made me realize that city developers had left the tree. They purposely designed the parking lot around the tree. When development occurs in the States, oftentimes, we scrape the entire lot and then re-landscape with smaller trees and shrubs, denuding the lot of any remnants of what was there originally. I personally think this is sad. Think of the stories that you are removing from the land to put in a new shopping mall or a suburb. That yew tree had to be at least a century old. What a life to preserve and honor! I am glad someone decided to leave the yew tree.
- Make Plants Part Of Your Weekly Ritual
We were able to visit the city of Glasgow’s Botanical Gardens on a Sunday. While I know botanical gardens are not typically free in the States, these botanical gardens were free! It was packed. Small and large clusters of people walked the paths, exploring the grounds or the glass greenhouses, and lounged in the open spaces. Many of these people were locals, and this is how they had chosen to spend their leisure time. We also saw Scots recreating in the rural spaces-hiking, playing by the beach, running into the ocean, and taking picnics. It seemed that Sundays, especially when other things might be closed, were a time to reconnect with nature and enjoy the simpler things in life with loved ones. I think implementing a ritual or a regular habit of connecting with plants or nature is something Coloradoans could get behind!
- Water Is A Resource-Protect It
Several times we saw advertisements on bus stops or buses that had the message: “Water is always worth saving. Help protect your precious resource.” Scots are very proud of their water, and even brag about how it tastes. It really does taste very clean and refreshing! Scots receive their drinking water from rainfall. There are towns that are experiencing a lack of water due to recent dry spells, and have had to have water trucked in. This sentiment of protecting water can be applied to Colorado. Coloradoans receive much of our drinking water from snowmelt. We are also dependent on precipitation for our water needs. In dry years, watering restrictions are put in place. While this year was relatively wet, there have been decades of dry years along the Front Range in our recent past. I think we all should be mindful and proud of our water, like the Scots! One way to protect our water is to be aware of how we impact our watershed- and those downstream of us. Here is a throwback blog on how to protect our watershed while gardening, click the link here.
Travel is part of a gardener’s education. But you do not have to go abroad to learn about how other gardeners approach plants or garden resources. The public library has a wealth of information on various gardening techniques that are from other cultures or other regions. I also think it is valid to check out other gardens in Colorado. Paonia and Berthoud both have independently claimed the title of “Garden Spot of Colorado.” Visit a high altitude garden in Aspen- Betty Ford Alpine Gardens. Or see a world-renowned crevice garden in Arvada -APEX Crevice Garden. When you travel, ask gardeners what they do in their garden. What works for them might be your new way of gardening too!
Planning For Trees
Gardening is for everyone, and that includes those who want a tree! How can this be? Not everyone has the space for these kinds of big plants. Not so fast-trees also include bonsai and indoor citrus too! Whether you want something decorative, fruiting, or just plain cool, we will help you pick and care for a tree that will thrive!
What To Look For: Location, Location, Location!
Trees are surprisingly delicate plants. Selecting the right plant, planting it at the optimal time, and choosing the ideal location is crucial for a tree to thrive. We’ll first go over site selection. Trees need space both above and below ground. Their canopies need to spread alongside their roots so they can establish themselves easily and live a long time. Keep in mind a tree’s full size before purchasing. If you’re lacking this space, a dwarf tree variety or even a shrub would be better.
Drainage also is important. Most soil in Colorado retains moisture poorly, however there can be areas with poor drainage in any environment. Picking a drought-tolerant tree would be best for soil that poorly retains moisture, the very best being a native tree. For a tree in a wet area pick one that enjoys damp soil, just don’t forget to water during the drier months!
Lastly, sunlight exposure is essential for trees (and generally all plants). Generally, trees need full sun but some don’t like bright hot light and prefer partial shade. Most trees we carry in our nursery will have little information packets attached to their branches about light requirements. If they don’t, our Ricksters are always happy to help!
What To Look For: Healthy Trees Please!
Now we get to the fun part: picking out the tree! Picking a healthy tree will benefit your wallet and the health of your garden or yard. An unhealthy or sickly tree can transmit disease and decay to other plants, so knowing what to look for while shopping is essential for everyone! Tree leaves shouldn’t be wilting, have discolored bark, odd spots, or oddly colored leaves. You shouldn’t buy a tree that has non-beneficial insects, like aphids or mealy bugs, on its leaves, branches, or bark. Trees should have evenly spaced branches and a central branch that acts as the main trunk. The Colorado State Forest Service suggests, “Tree foliage and branches should be distributed on the upper 2/3 of the tree.” Study the tree roots too. Are roots circling, appear pot bound or are suffocating the stem and trunk of the tree? These are all bad signs and this tree shouldn’t be purchased.
Why Natives?
Some trees will do better in Colorado than others. Native trees in particular are hardier and built for our drastic climate. Generally, they will also need less maintenance, like less watering, pruning, and insect control. Natives will thrive in Colorado hardiness zones, though there are always exceptions. A great place to check out native trees and shrubs is at Colorado State University Extension. Alongside pictures, each tab is filled with information about the plant’s preferred elevation, habitat, and more. Click the link to learn more: https://csfs.colostate.edu/colorado-trees/colorados-major-tree-species/
Planting
Trees have specificities when it comes to planting. When you choose to purchase a tree from our nursery, we’ll typically send you home with one of our tree-planting guides. It’s also available on our website, link located here for ease: https://www.ricksgarden.com/wp-content/uploads/2021/04/Ricks-Tree-Shrub-Planting-Guide.pdf .
We want to remind you to NOT FERTILIZE your tree for the first year! This can damage and even kill a tree. Trees are getting established in their new home and this is a stressful time. Applying fertilizer adds unnecessary stress in the first year.
Whether you choose a flowering crab apple or go the native route and pick a tree that easily establishes in our area, finding the right fit tree is what we should all strive for. A chosen tree should be picked to thrive in your yard’s microclimate. Once established, trees return the favor. Providing shade, habitats for animals and birds, cleaning the air and water, and limiting rain runoff are just a few of the reasons a tree can benefit the community. Likewise, trees increase property value and cut noise pollution! Trees are legacy gifts to the environment and to future generations. Whatever your reason is for choosing a tree we’re happy to help you do it right. Happy gardening!

Coco Coir vs Peat Moss
By Katherine Placzek
Dear reader,
This article began initially with a straightforward trajectory. I was going to lay out why using peat moss in soil mixes is environmentally harmful and that we all should make the switch to using coco coir. But as I continued my research, I found it was not that simple and the subject required lots of continued digging to find accurate information. Instead, I am going to try to educate you on both substrates to the best of my ability.
Peat Moss:
Why is it used:
Peat moss has an incredible water retention capability- holding 20 times its weight in water. It also has a small but not insignificant amount of nutrients. You can pot a plant directly in peat moss and it will grow due to these nutrients. It is light and fluffy, used by many gardeners to lighten existing soils. It is highly acidic if not amended with lime, and shrubs like hydrangeas or blueberries can successfully be planted into peat. It also can be used as a pea/bean inoculant. It was not until the 1970s that peat became commonplace as a planting substrate for plant people.
How is it harvested/manufactured:
Peat bogs have centuries (possibly more) worth of plants and decomposing peat/sphagnum peat growing and compacting in a dynamic cycle and ecosystem. It is estimated that peat bogs contain more than 44% of all the Earth’s soil carbon and thus are considered a carbon sink (where carbon is stored and absorbed from the atmosphere). Harvesting practices vary in different bogs and countries. The majority of the peat sold in the United States is harvested in Canada. 95% of all peat in Canada is harvested in partnership with the Canadian Sphagnum Peat Moss Association (CSPMA). The CSPMA has strict regulations that they follow, and are involved in many ecological restorations, as well as scientific research behind peat bogs, and the living organisms that use the bogs as habitat. Many of their practices publicize that they attempt to reduce harm, prevent overharvesting, protect habitats, and replant as part of their aim toward sustainability. While this sounds good, in 2021, it was reported that peat harvesting released 2.1 megatonnes of carbon dioxide into the environment. That’s the equivalent emissions of the annual emissions of five gas-fired power plants. Critics also point out that rehabilitated peat bogs are unable to become a carbon-accumulating ecosystem (or a carbon sink) until roughly 20 years after harvesting. Harvesting in other countries is not regulated and they are likely not as concerned with any harm associated with their practices. All harvesting is mechanical due to utilizing fossil fuels. The UK has banned all peat sales for personal gardens beginning in 2024.
Factors to consider:
- Peat bogs house diverse and intricate habitats for all sorts of living organisms. Harvesting, regardless of practice, disrupts this environment.
- Peat bogs are considered carbon sinks- absorbing carbon from the atmosphere. Harvesting peat releases carbon into the atmosphere, causing concern that this practice contributes to climate change.
- Fossil fuels are used in the harvesting process and are used in the shipping of this product to garden centers and other plant/ home improvement stores.
Coco Coir:
Why is it used:
Coco Coir also has a high water retention rate, retaining 8-9 times its weight in water. It does not have any innate nutrients or pH implications, so it is a neutral starting point as a substrate. Coco coir is a waste product from all other food-grade products made from the meat/ milk of the coconut. Before the 1980s, millions of tons of coco coir were left to decompose in large piles, often taking close to 20 years to decompose. Now there is a market for this “waste product,” as a soil substrate.
How is it harvested/manufactured:
Many coconut plantations are based in the poorest countries, Sri Lanka, India, Vietnam, the Philippines, and more recently, in Central and South America and even Mexico. Coconut plantations are often monocultures that reduce natural biodiversity and cause displacement of living organisms. Coconut trees produce a lot of coconuts but do so at the cost of soil degradation. The coconut hull first is soaked in water (freshwater or saltwater) for a long time to break down the fibers on the hull. This process is called retting. The retting process generates water pollution. Among the major organic pollutants are pectin, fat, tannin, toxic polyphenols, and several types of bacteria including salmonella. While scientists are experimenting with treatment options, there does not seem to be a broad-scale accepted solution at this time. This wastewater is often returned to the local community’s water supply or the ocean. Then, either the coconut hulls can be highly processed through mechanical mastication, or beaten and broken down further by hand. This manual process creates a lot of dust, and workers are typically not provided any PPE (Personal Protective Equipment). Reports indicate an increase in respiratory illnesses in communities with coco coir processing. Many of the following processes, if mechanized, are achieved with fossil fuels. There are currently no regulations on the industry’s standards. I also found conflicting information on whether a second rinse with chemicals is necessary, so that is an additional set of pollution outputs to consider. In general, it’s harder to find reputable sources explicitly sharing information about coco coir. This makes me concerned about the transparency of the industry, as well as possible offenses that are intentionally hidden from the public’s knowledge.
Factors to consider:
- Many coconut plantations are monocultures, created by destroying native habitats for diverse organisms, thus causing soil degradation.
- Pollution of the environment due to wastewater from retting processes.
- The lack of regulations concerning this product allows for humanitarian abuses to occur, including health hazards for workers and the surrounding community.
- Fossil fuels are used in portions of the manufacturing process and in transporting this product to your local garden center.
I think continuing to use coco coir or peat moss warrants extra research. Dig into the companies that you are supporting. Do they have certifications, and third-party ratings that indicate that they care about their staff’s health and wellbeing? The environment and the community they impact? Their carbon footprint? Other points that you are passionate about?
All of this makes me consider, there have been gardeners and plants people before me who did not have access to these substrates. What did they use before? Compost. Manure. Leaves. Green manures/ cover crops. Aged forest products (humus). Straw. None of these probably have the water retention that peat moss or coco coir boast, but they all have higher nutrition, which means prior plants people did not have to fertilize in the same manner that we do when we utilize a peat or coco coir base. Many of these local inputs are also free. All of this is interesting and will lead to further research on my part.
The most honest conclusion that I can make is that, when we are removed from the product we are buying, we also become naïve of the ultimate cost and any negative impacts of the product. Perhaps, the point here is to grow plants that are acclimated to our growing habitat (for instance, native plants do not need peat or coco coir to thrive), or to build soil from what nature provides in our local vicinity. While this is easy to say, it is harder to do. I think this new knowledge is powerful, though. We can always experiment and try new things in hopes of finding replacements that have a lesser negative impact. Good luck with your own decisions ahead of you!
Soils that we carry that do not contain peat moss or coco coir:
Back to Earth-
- Composted Cotton Burrs (Acidified and Non-acidified)
EKO-
- Clay Buster
- Top Dressing
Happy Frog-
- Soil Conditioner
Rocky Mountain Soils-
- Top Soil
- Humus
- Compost Cow
- Tree and Shrub
Yard Care-
- Soil Pep
Note: We also carry a variety of only coco coir or only peat-based soils, if you decide you prefer one over the other.
Resources to utilize in your own research:
I think that Gardener Scott (A gardener in CO, who has an excellent library of YouTube videos on vegetable gardening) has a comprehensive video on the pros and cons of both of these substrates.
The link to the website that Gardener Scott references: https://www.gardenmyths.com/coir-ecofriendly-substitute-peat-moss/
Canada’s National Observer on the carbon footprint of peat harvesting: https://www.nationalobserver.com/2023/07/07/news/canadas-carbon-storing-peat-digs-climate-dilemma#:~:text=According%20to%20Environment%20Canada%2C%20about,of%20growth%20within%20those%20sites.
21 report on carbon sinks and greenhouse sources in Canada: https://publications.gc.ca/collections/collection_2023/eccc/En81-4-2021-1-eng.pdf
A Q&A with the Canadian Sphagnum Peat Moss Association (CSPMA):
The CSPMA’s website (includes the history of peat, how their manufacturers harvest peat, industry reports, and more) https://peatmoss.com/
Generalized information on how coco coir is made: https://www.madehow.com/Volume-6/Coir.html
Another source on how coir is made: https://coir.com/utility/how-to-make-coconut-coir-the-manufacturing-process/
A study linking coco coir to impaired respiratory function: https://www.thepharmajournal.com/archives/2023/vol12issue3/PartAR/12-3-455-522.pdf